VMware's new licensing is killing homelabs... Time to move to Proxmox !
Proxmox is definitely a fascinating solution, especially when it comes to homelabs. But why stop at a simple standalone setup? Let’s dive right in and build a 3-node high-availability cluster, complete with both compute and storage!


Well, looks like ESXi isn’t free anymore (thanks Broadcom...), so it’s time to kiss it goodbye for our homelab. No worries at all, let’s explore new horizons with Proxmox and build an even better lab.
It’s gonna be way cooler than the one we had with ESXi as we’ll add compute and storage High Availability... and all for free!
Wooohh baby, that sounds like music to my geeky ears !
So, let's build a Proxmox cluster with Ceph shared storage for full HA.
Every step to get started:
- Infrastructure design
- Proxmox installation
- Network configuration
- Cluster creation
- Ceph installation
- OSD configuration
- Pool configuration
- Monitors and Managers setup
- High Availability configuration
- Fine-tuning the details
1/ Infrastructure design
The target infrastructure will be a 3 host cluster setup.
Each network is separated, which is best practice for a Proxmox and Ceph cluster. Storage and cluster operations require low latency on the network and can't handle the overload that might come from front-end services. The networks are split as follows: one network is dedicated to front-end access, while two are reserved for the backend cluster and Ceph storage.
Each node has one drive for the Proxmox OS, and three additional drives that will be included in the Ceph Pool for enhanced performance and redundancy.
Below the cluster diagram :
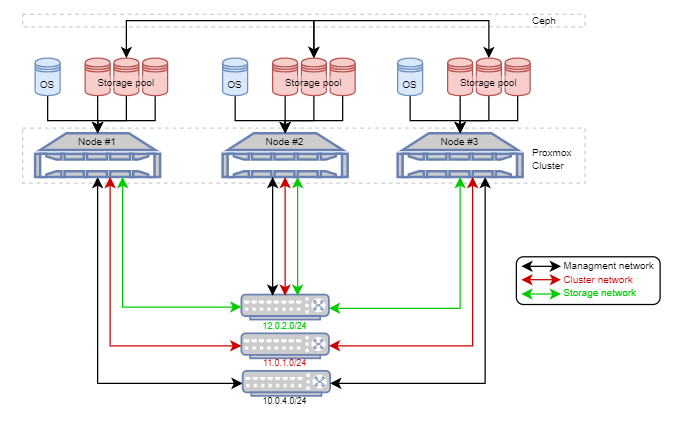
IP Configuration :
| Managment | Cluster | Storage |
|---|---|---|
| Node#1 : 10.0.4.210 | Node#1 : 11.0.1.10 | Node#1 : 12.0.2.20 |
| Node#2 : 10.0.4.211 | Node#2 : 11.0.1.11 | Node#2 : 12.0.2.21 |
| Node#3 : 10.0.4.212 | Node#3 : 11.0.1.12 | Node#3 : 12.0.2.22 |
2/ Proxmox installation
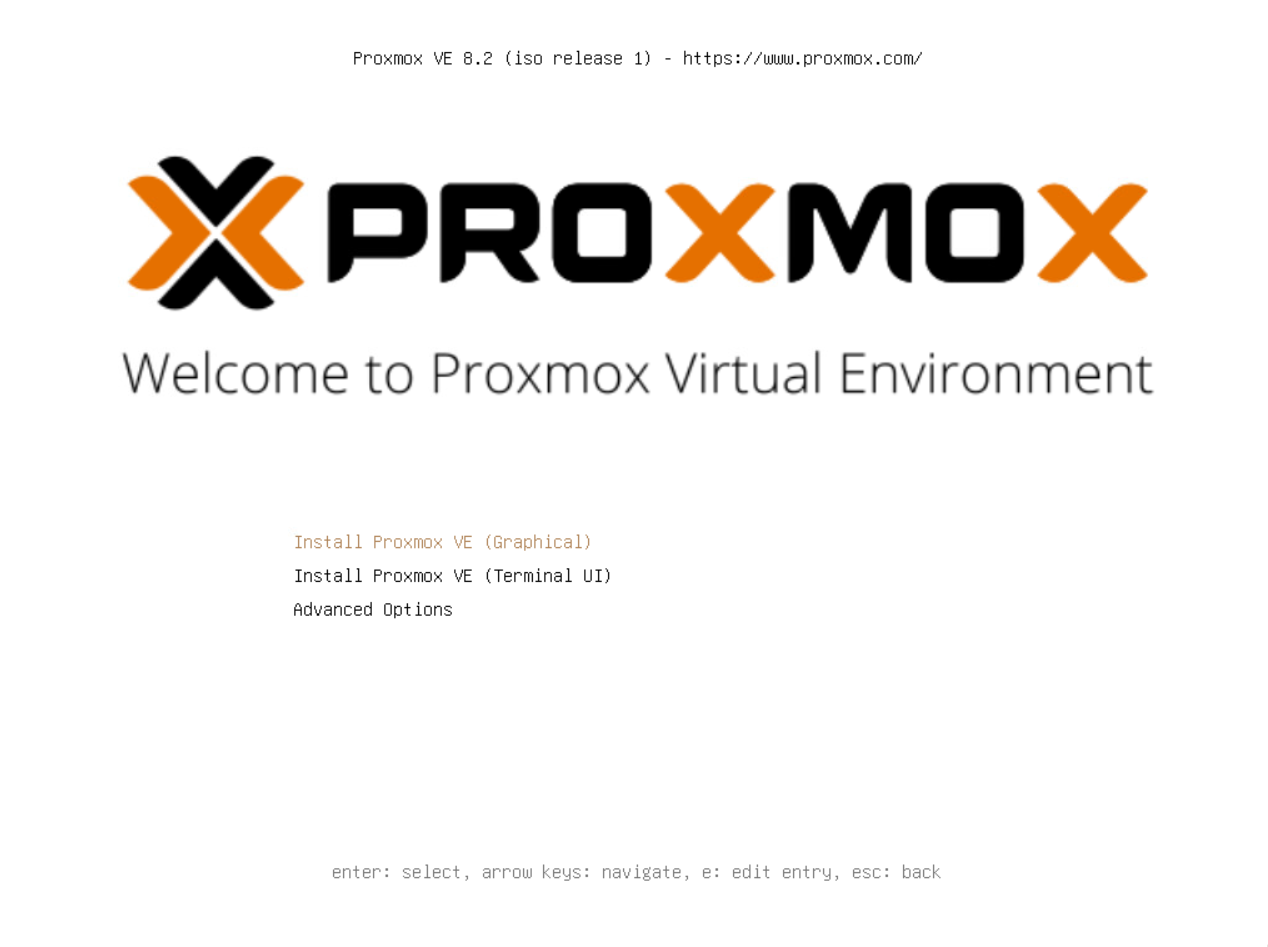
Download the ISO installer from official Proxmox website.
Use Balena Etcher or Rufus to create bootable USB drive from the ISO file.
(or boot from PXE; we will cover this case in a future article I have to write)
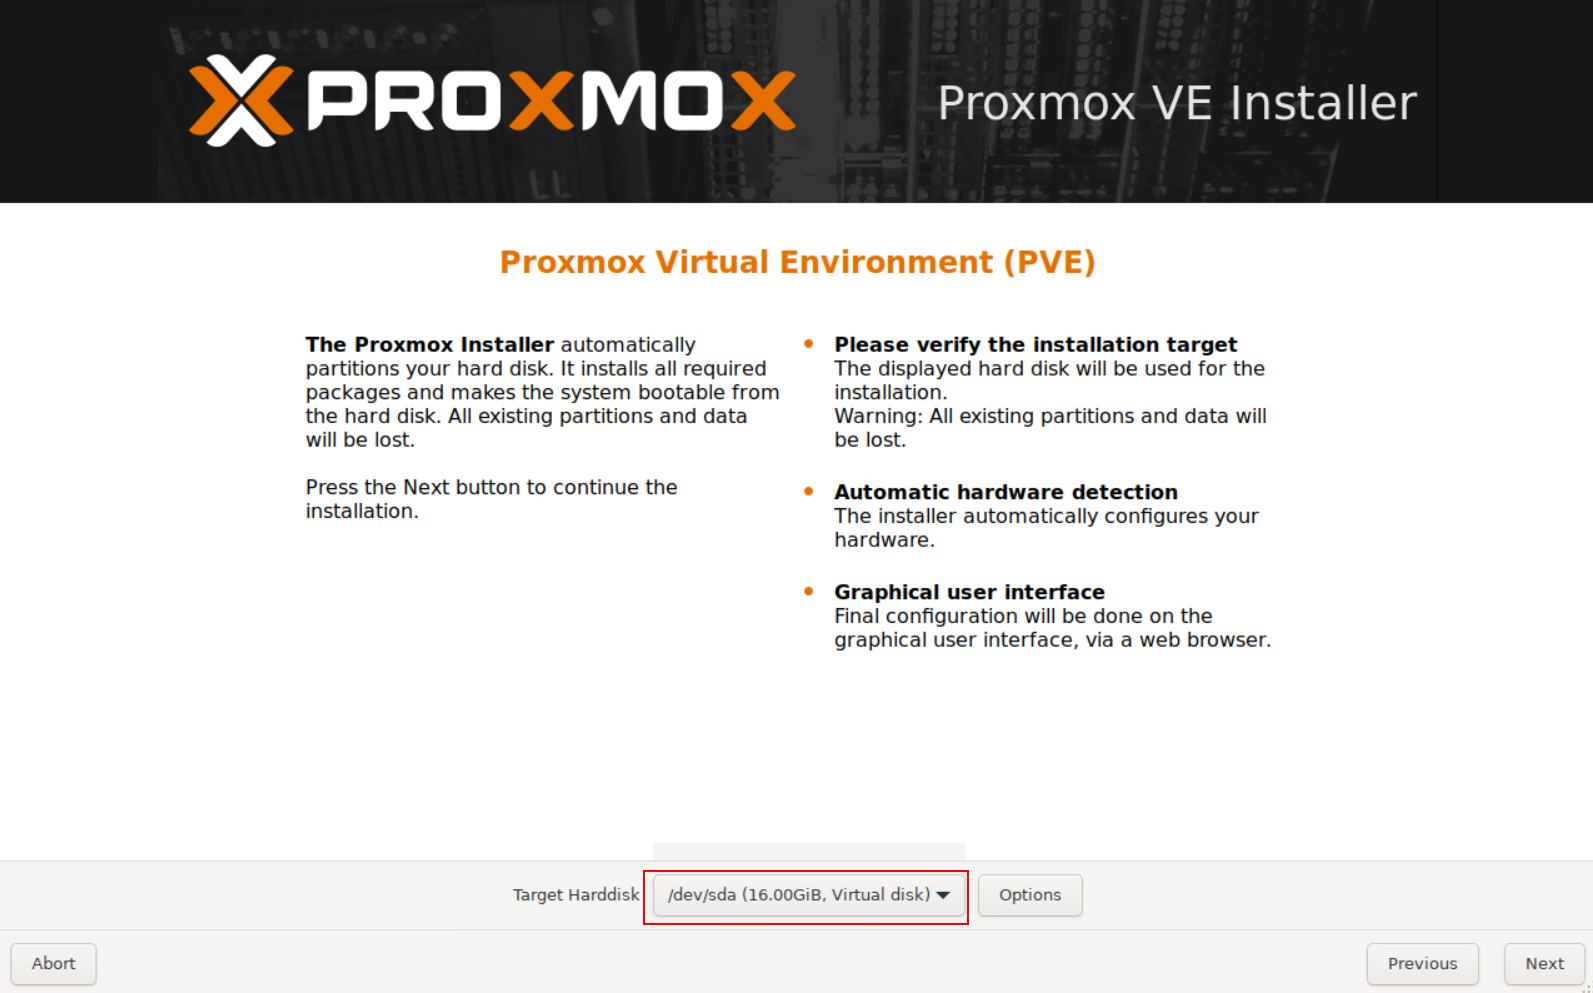
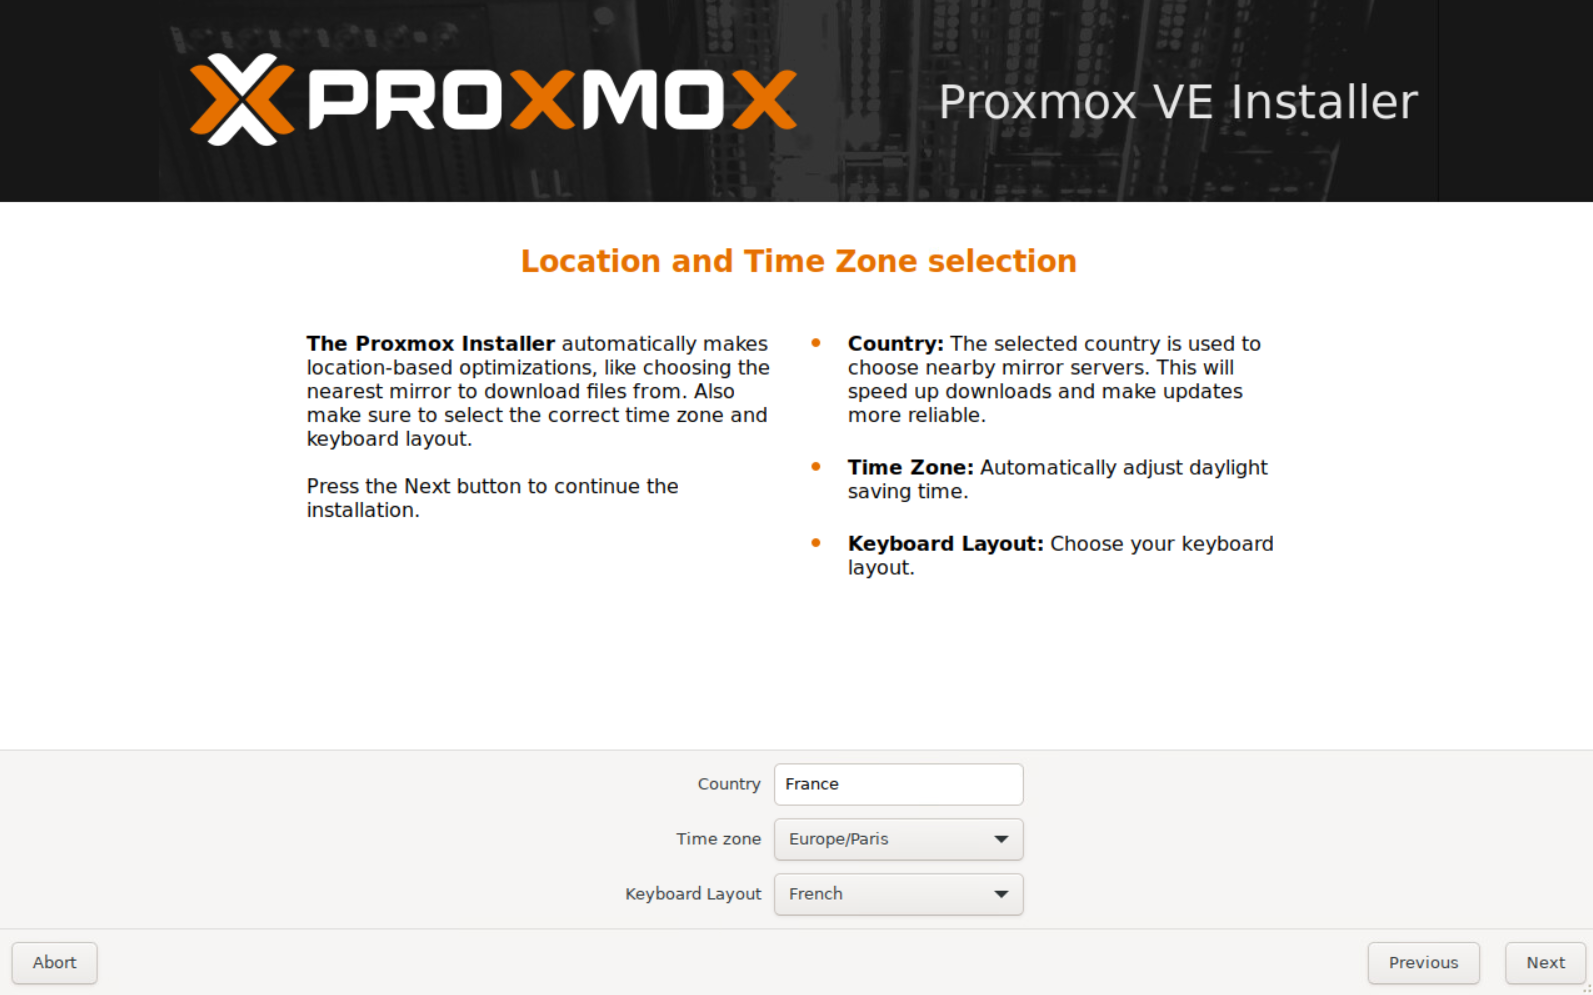
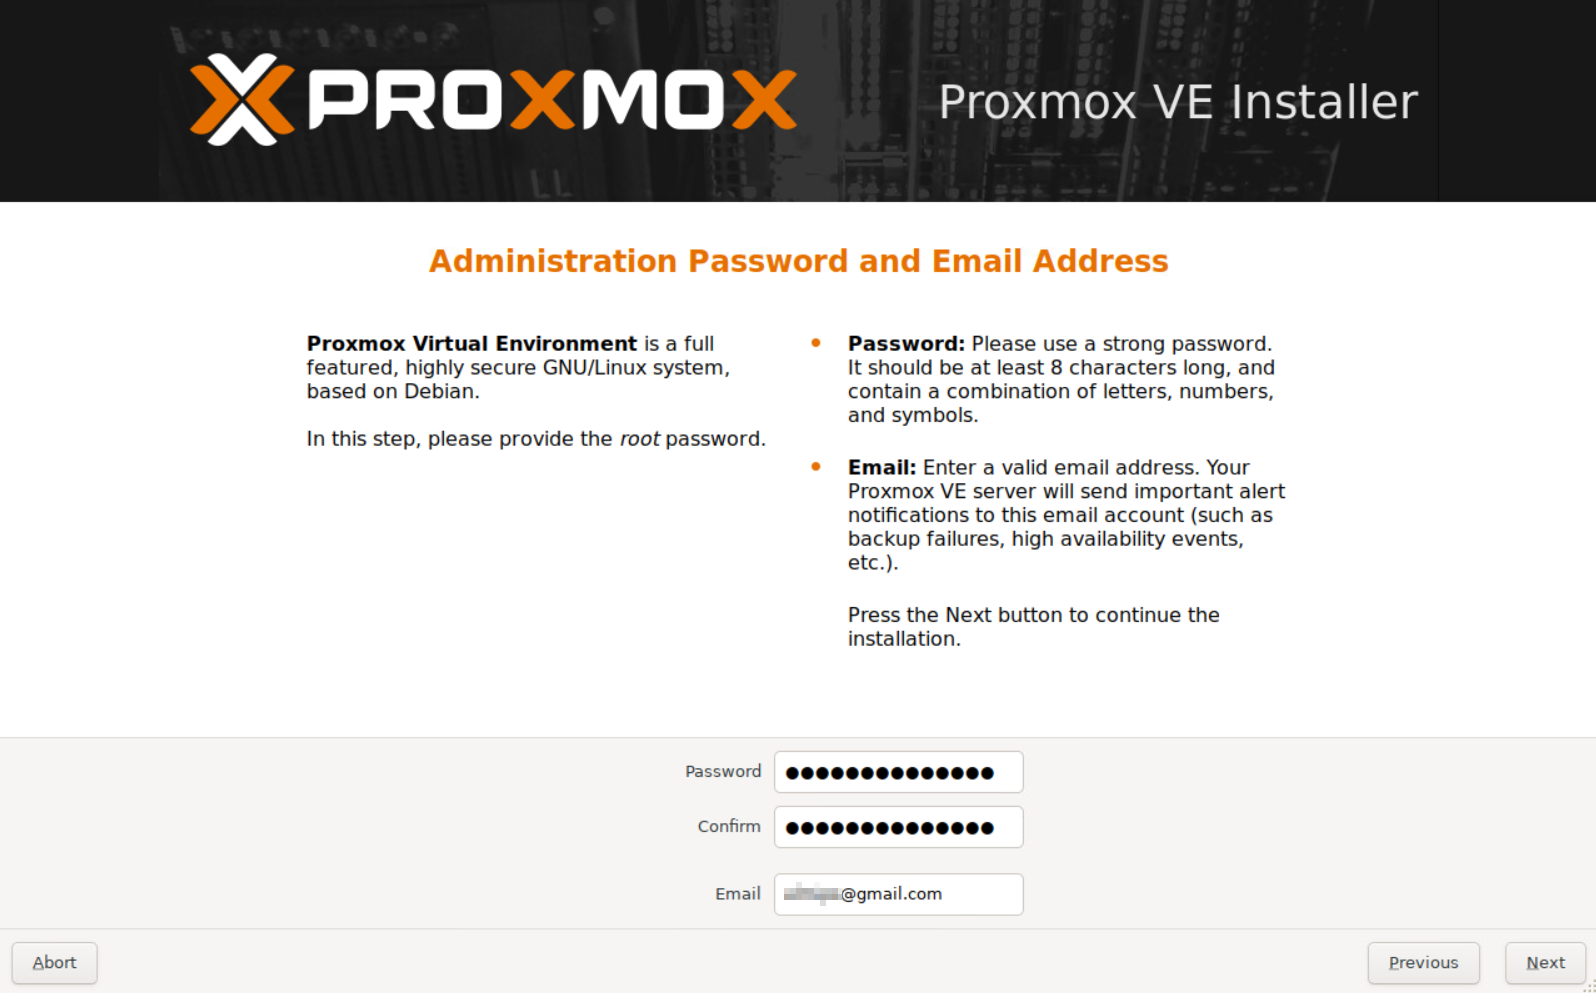
Boot Node#1 from the USB drive and install Proxmox.
The installation is pretty straightforward—no complications here.
Follow the step below :
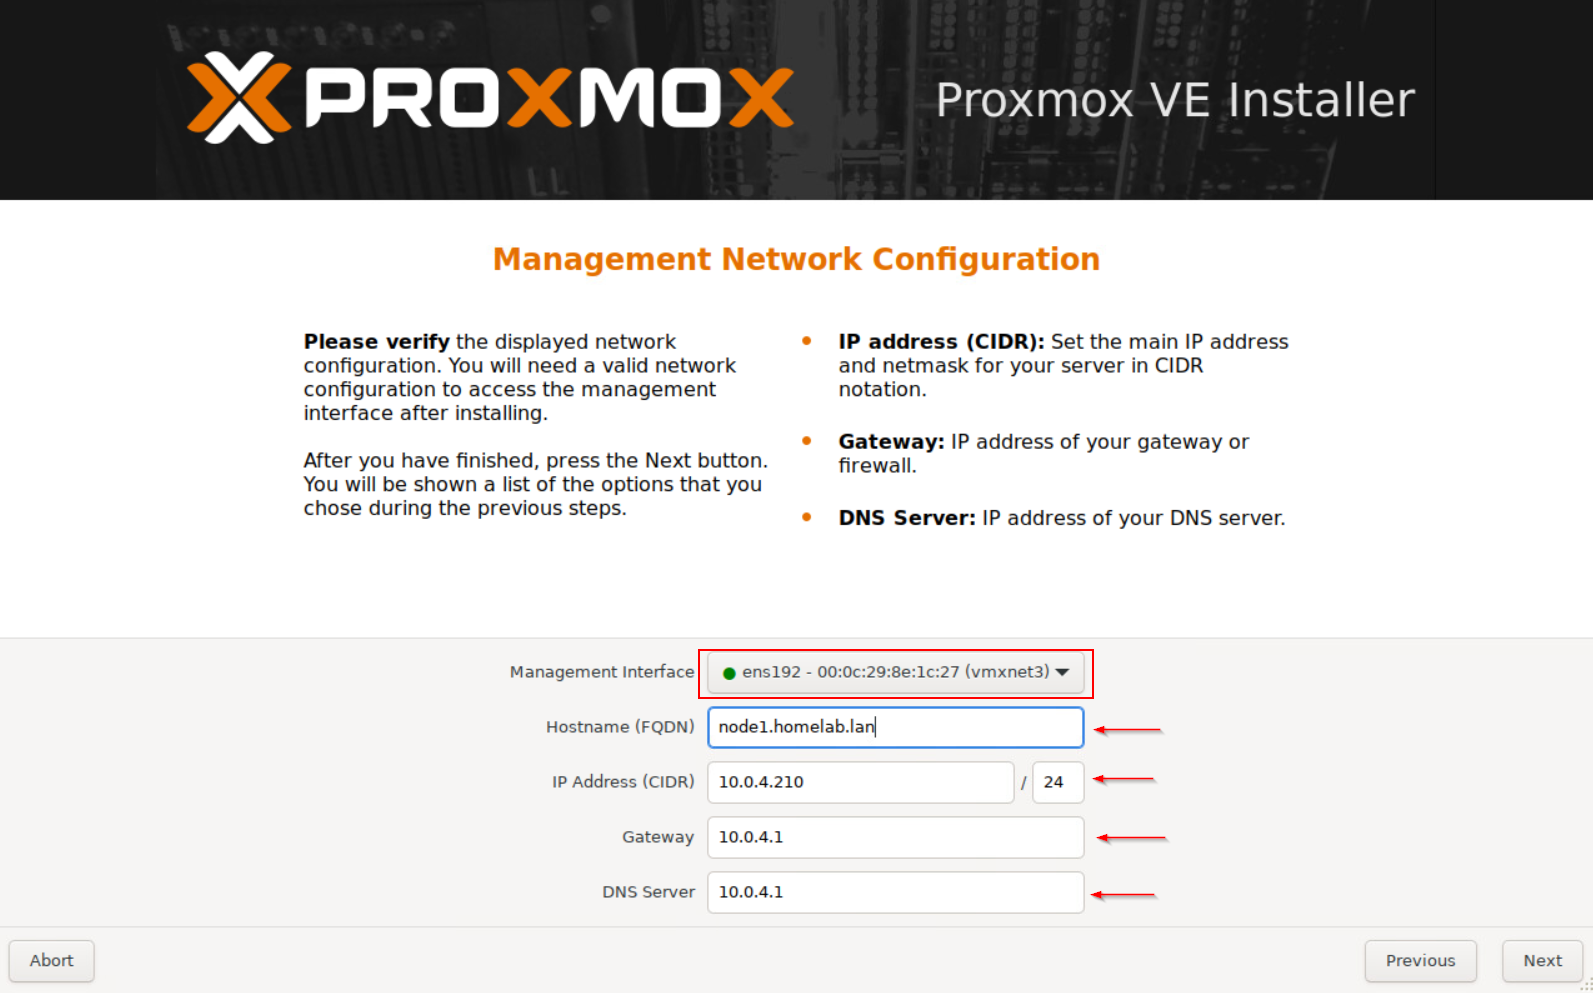
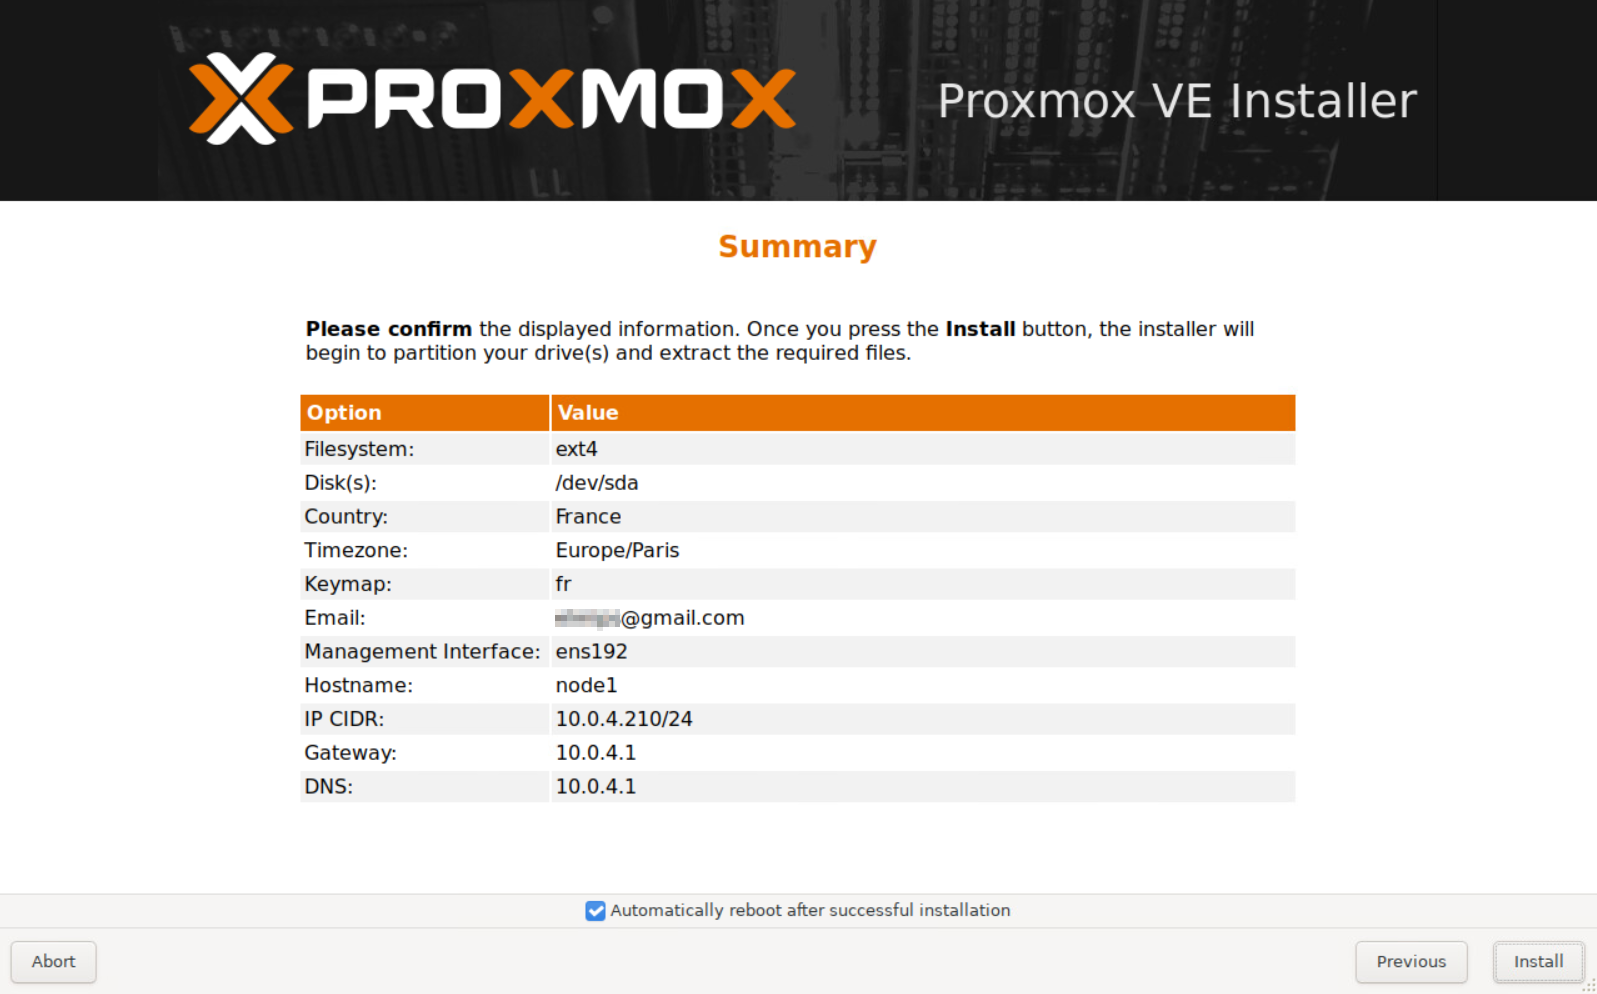
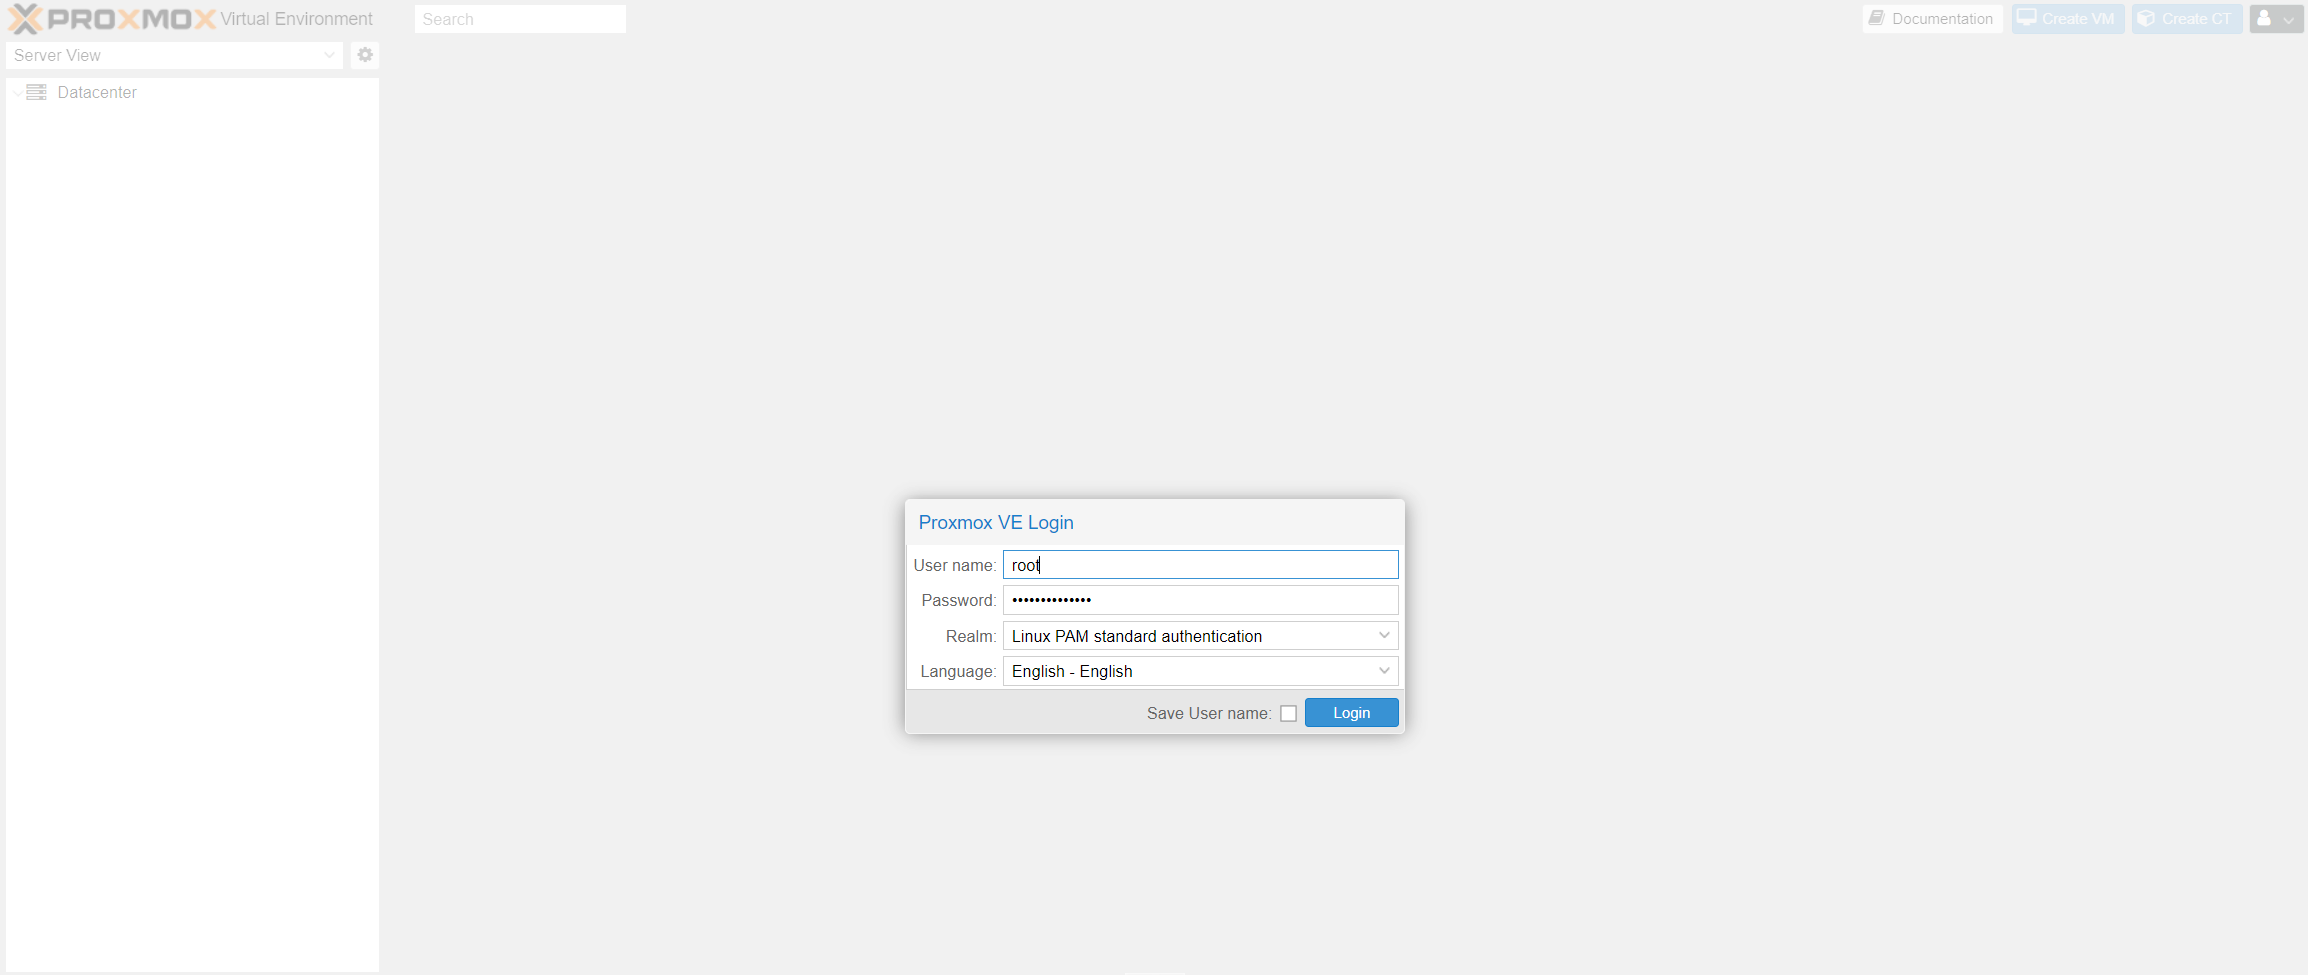
Once the installation is complete and the system has rebooted, you should be able to access Proxmox VE management at https://yourip:8006.
Do the same process to install Proxmox VE on Node#2 and Node#3.
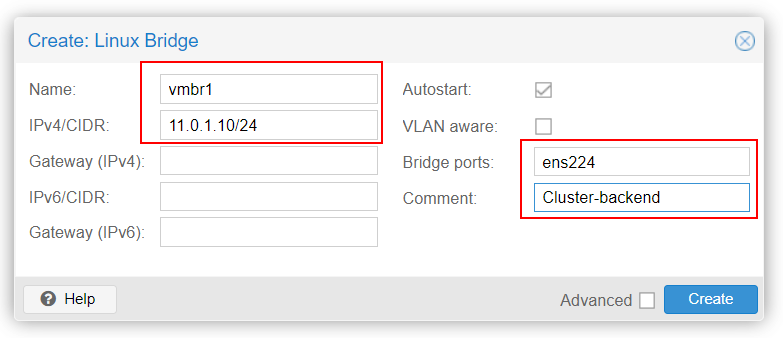
3/ Network configuration
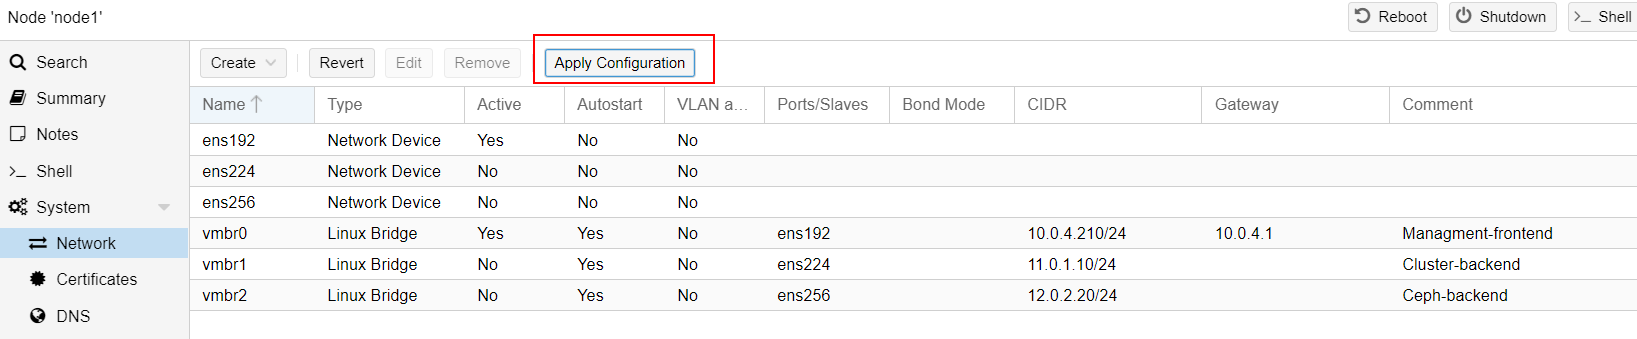
We have to create each virtual interface under Proxmox to assign cluster and storage backend networking.
Let's start with Node#1 configuration :
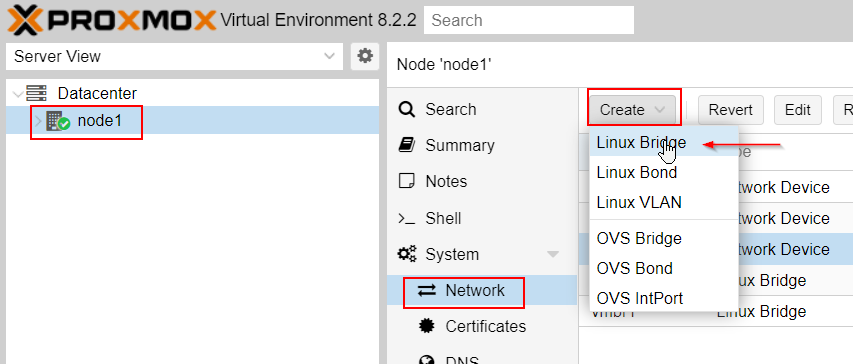
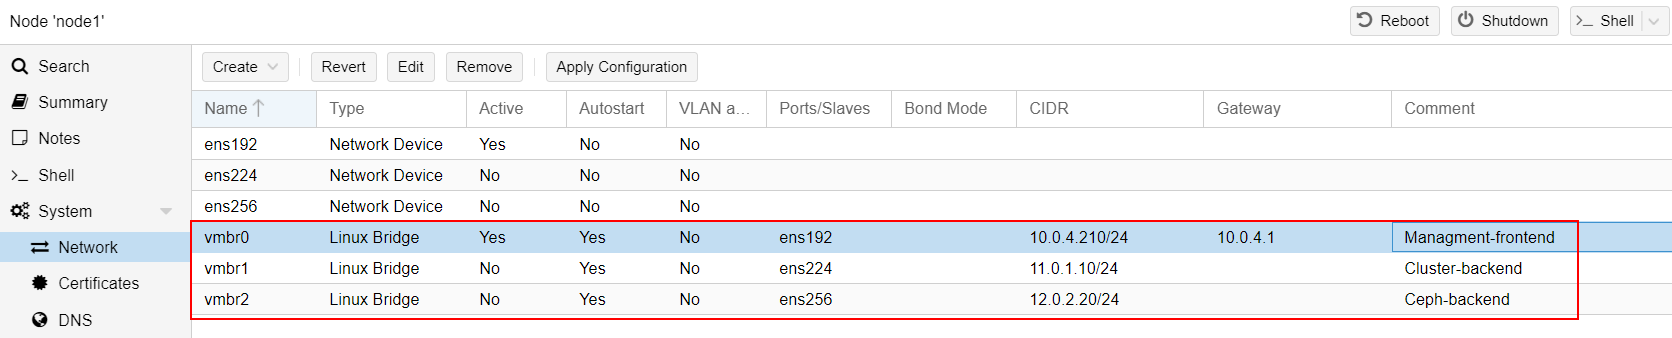
Repeat the process for Node #2 and Node #3 with their respective IPs.
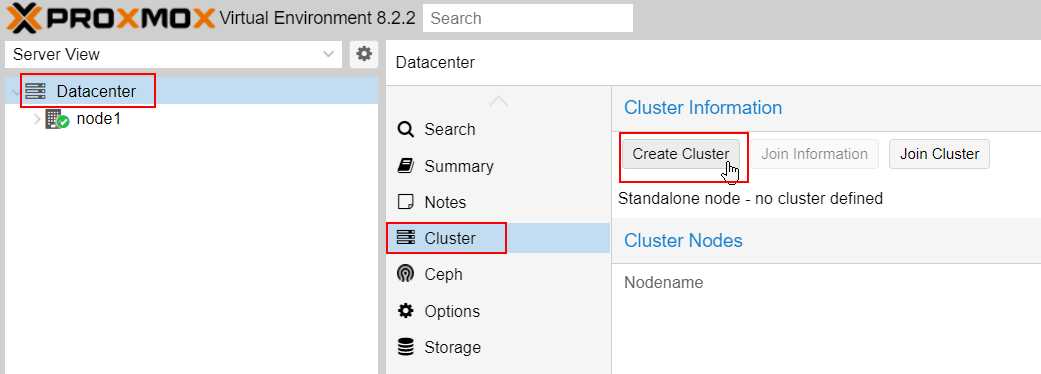
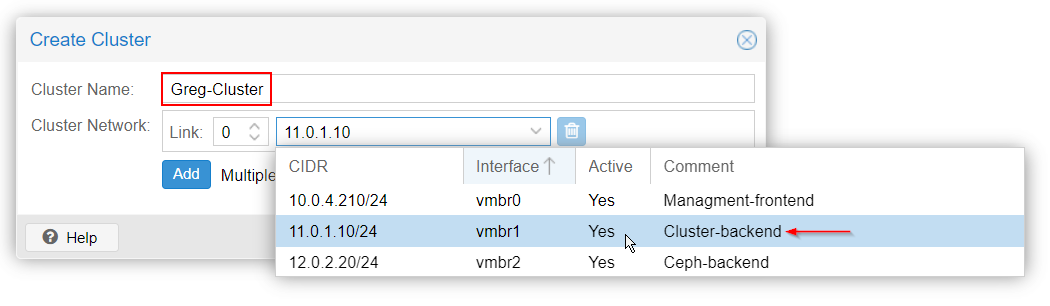
4/ Cluster creation
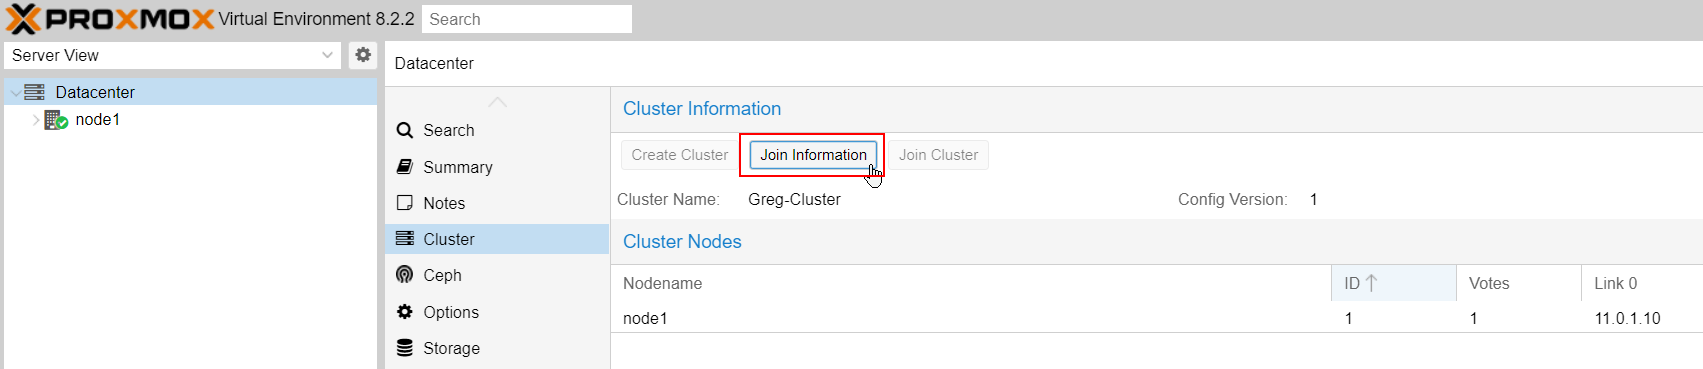
On the first node#1, we have to initiate the cluster creation.
Go to Datacenter -> cluster -> hit "create cluster" :
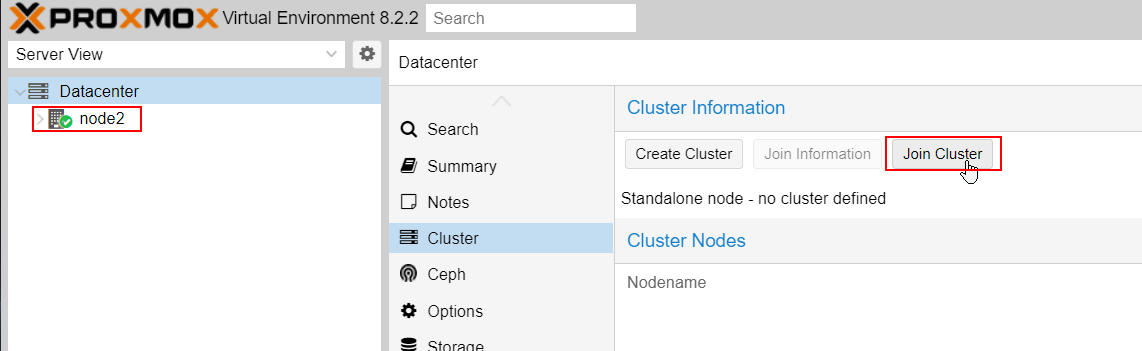
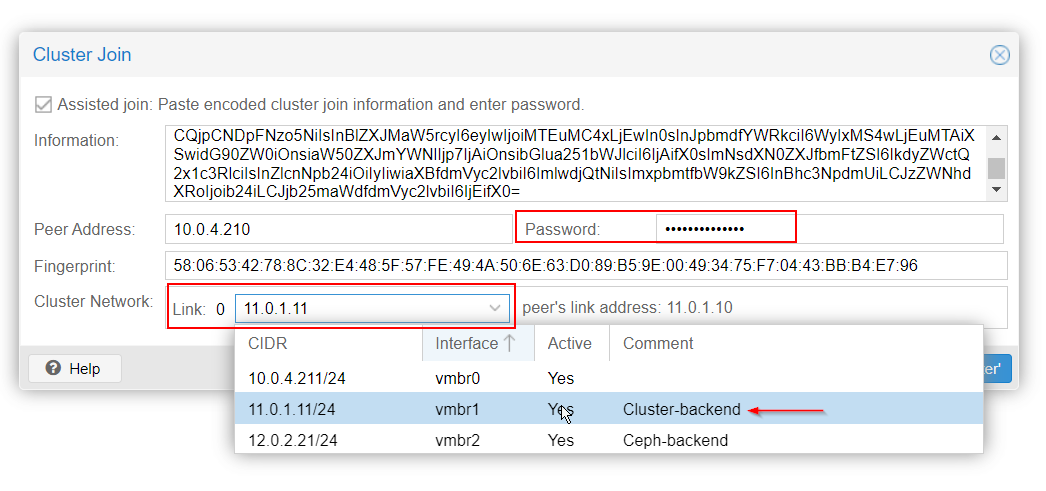
Now, add Node#2 and Node#3 to the primary Node#1 cluster.
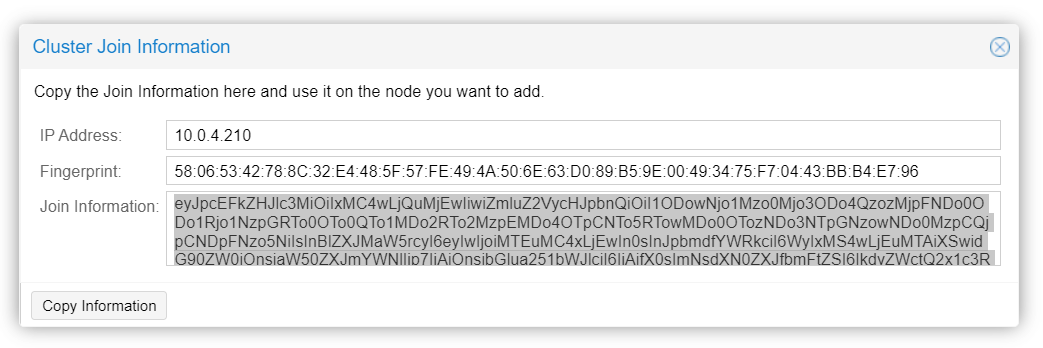
On Node#1, hit the "join information" button and copy the key:
On Node#2, hit "join cluster" :
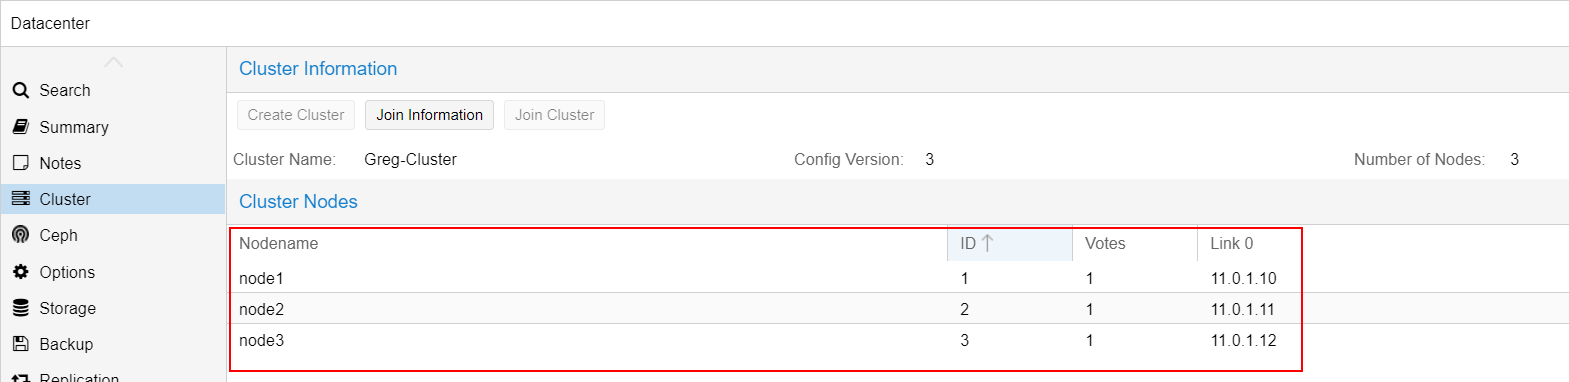
The cluster is now set up. All nodes should appear under Datacenter:
5/ Ceph installation
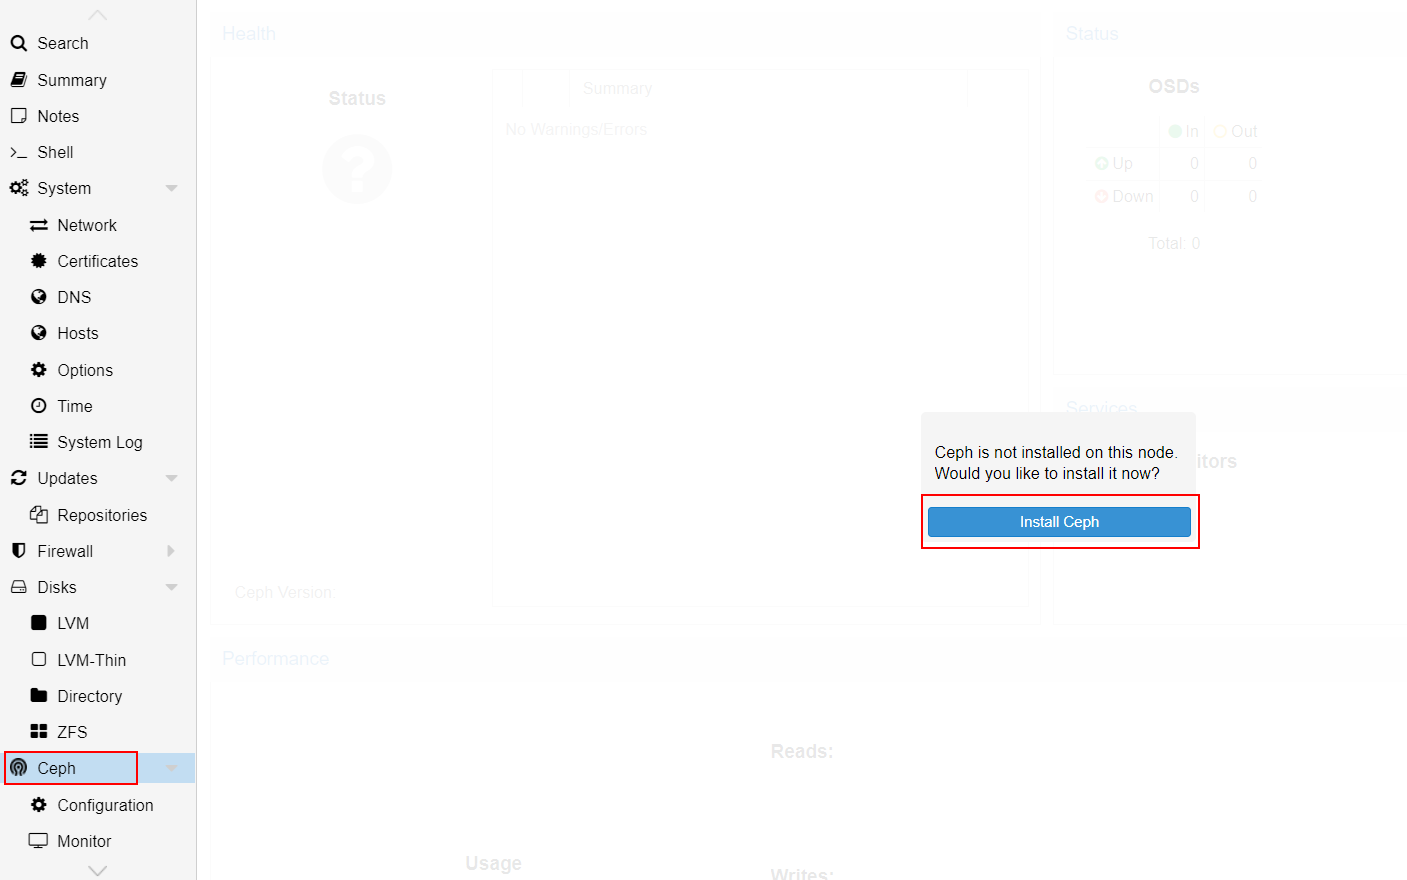
On Node#1, got to Ceph and hit "install Ceph" :
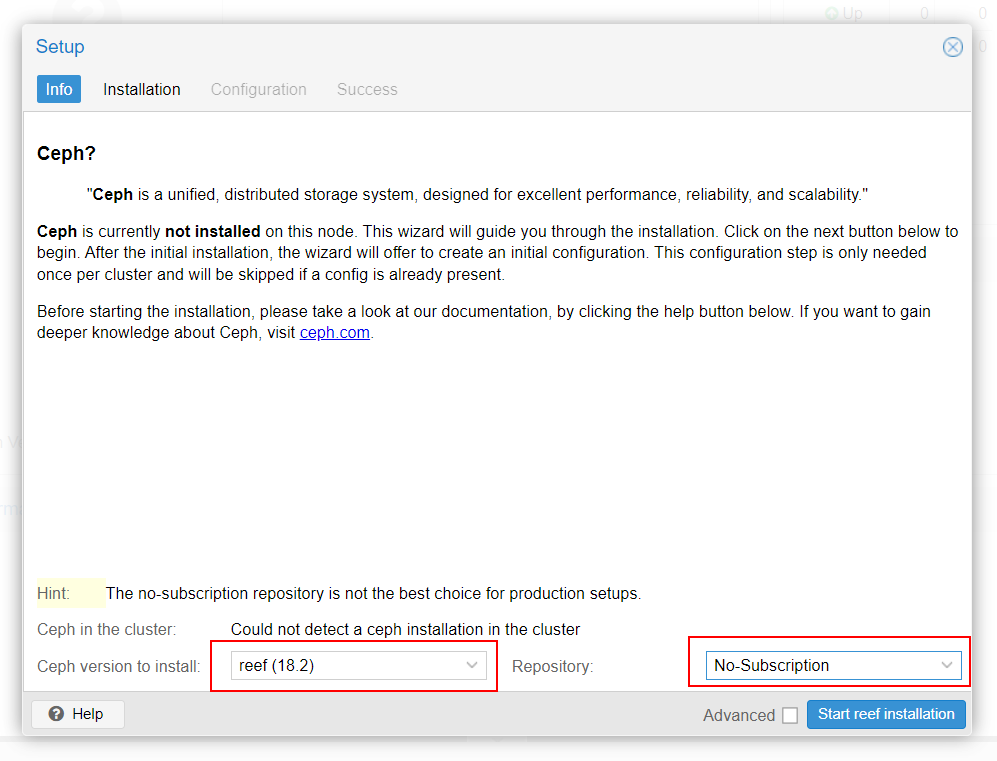
Select "Reef18.2" version of Ceph and "No subscription" repository, then start the installation of Ceph :
Next, setup the backend for Ceph storage network :

Next, do the same Ceph installation on Node#2 and Node#3.
6/ OSD configuration
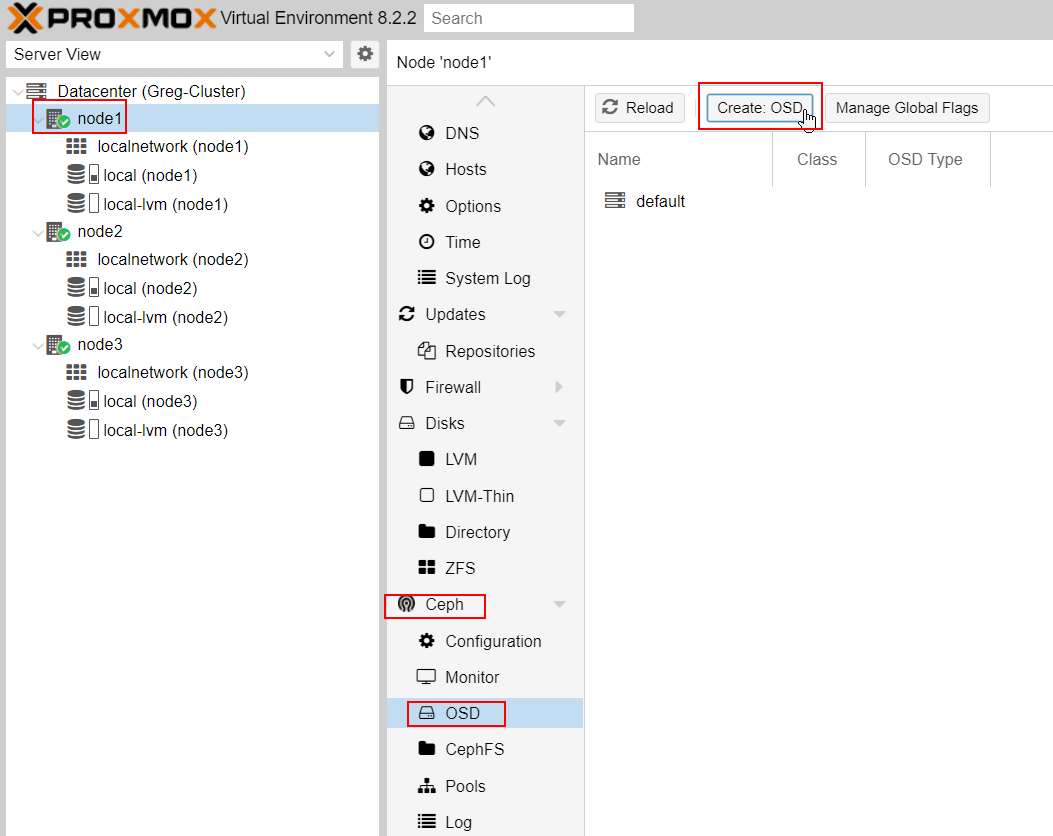
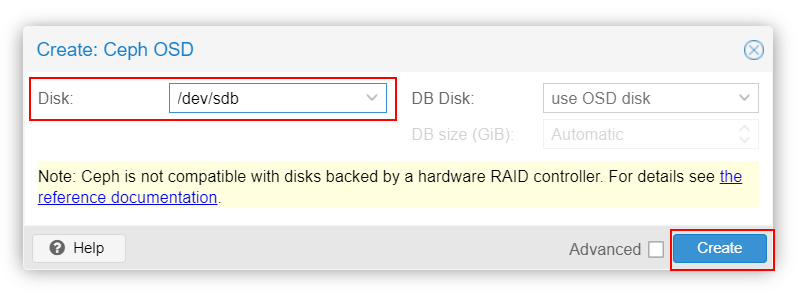
On Node#1, go to Ceph -> OSD and create new OSD by add your drives :
Add your drives (mine will be the 3 drives : sdb, sdc, sdd) to the OSD.
the result should be as below :
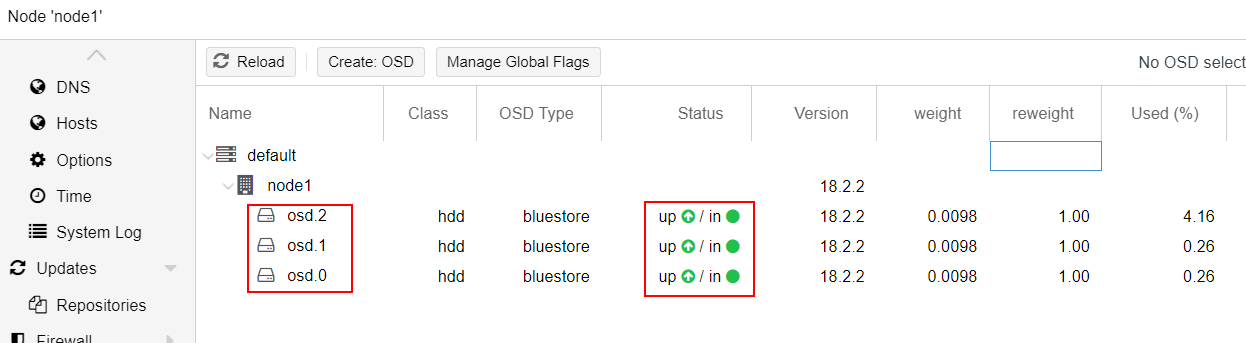
Do the same on Node#2 and Node#3.
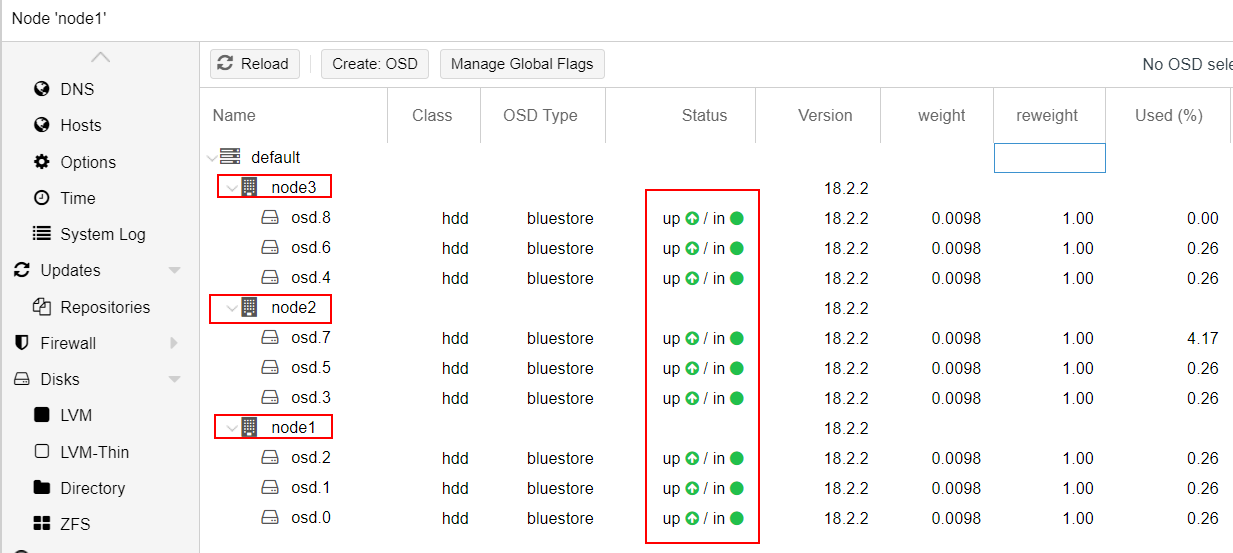
The end result should look like the screenshot below :
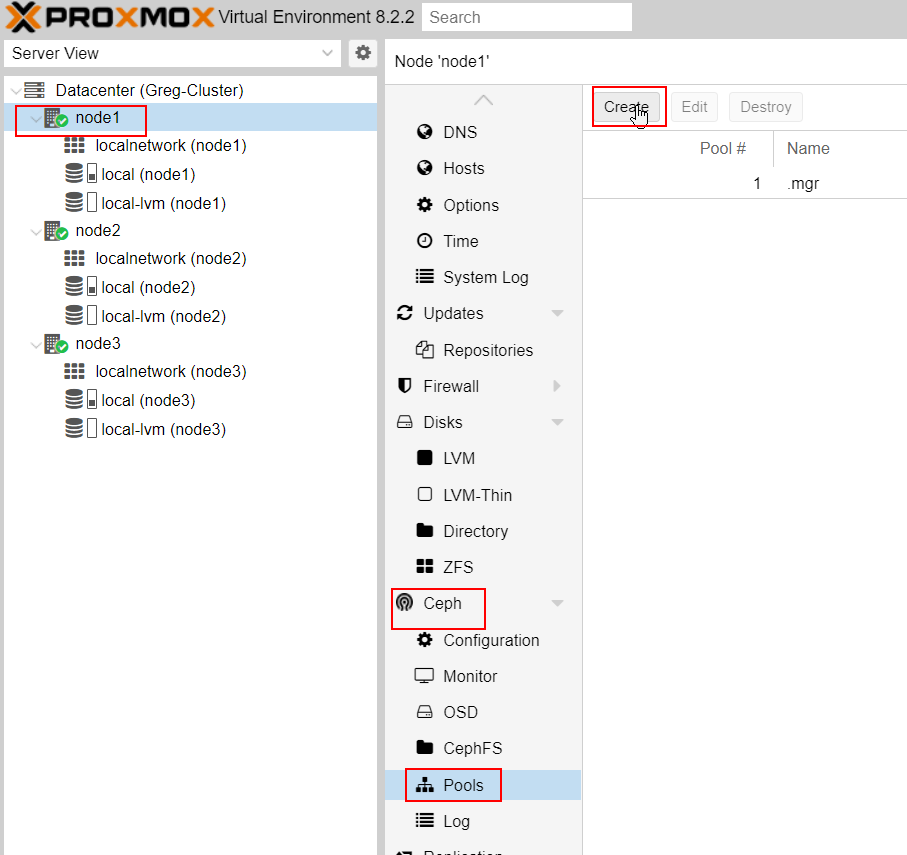
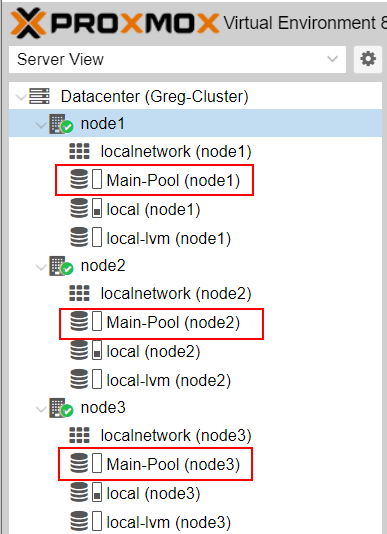
7/ Pool configuration
On Node#1, create a new pool and name it from theses newly added OSD :
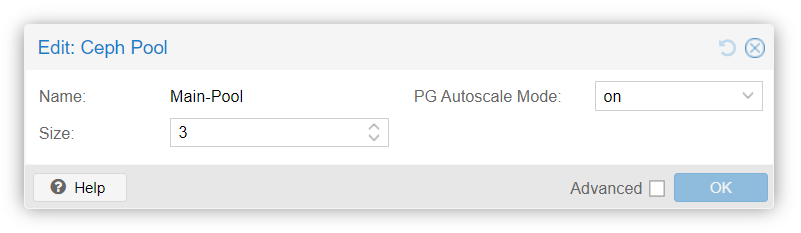
The Main-Pool is now available for each node of the cluster :
8/ Monitors and Managers setup
We will now add Monitors for theses OSD : click on Ceph -> monitors and add monitor of each node.
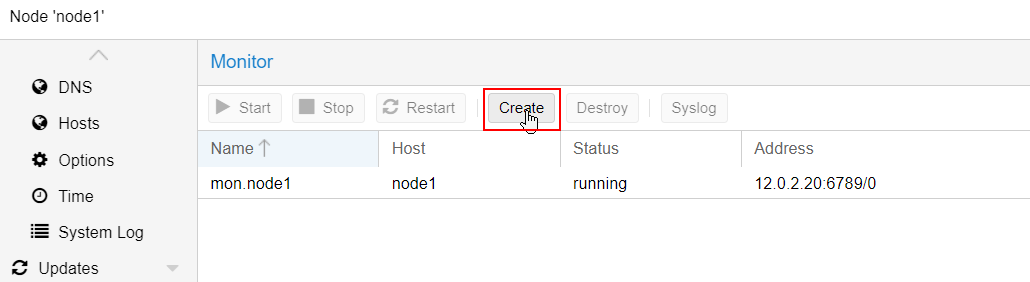
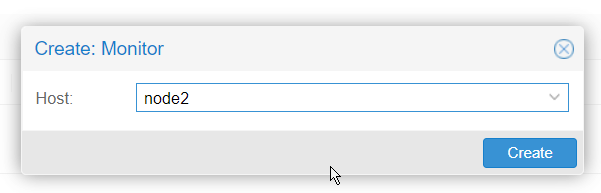

Do the same for the managers :
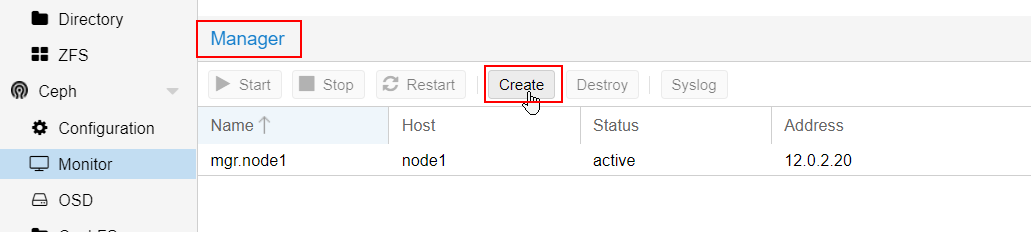
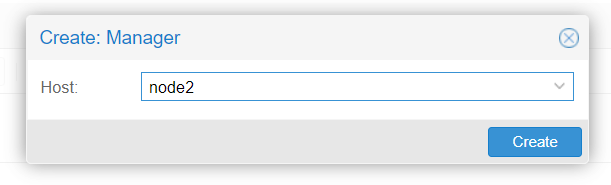
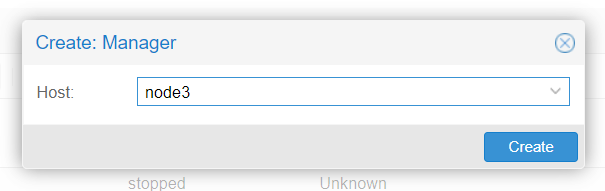
They enhance the cluster's management but they are not core decision-making.
The final result should be as follow :
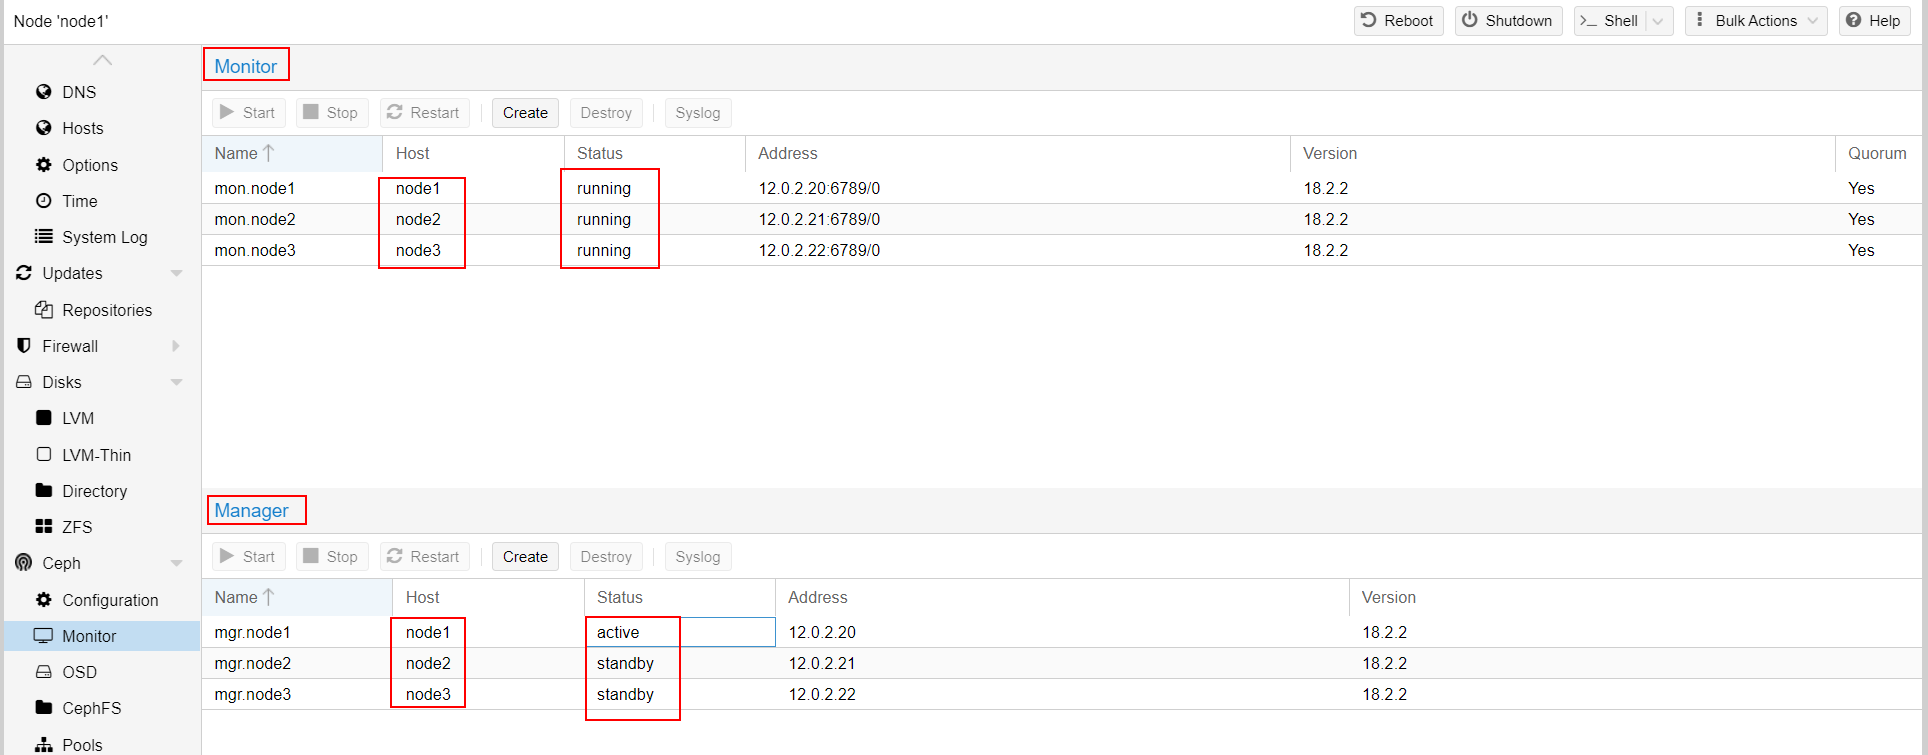
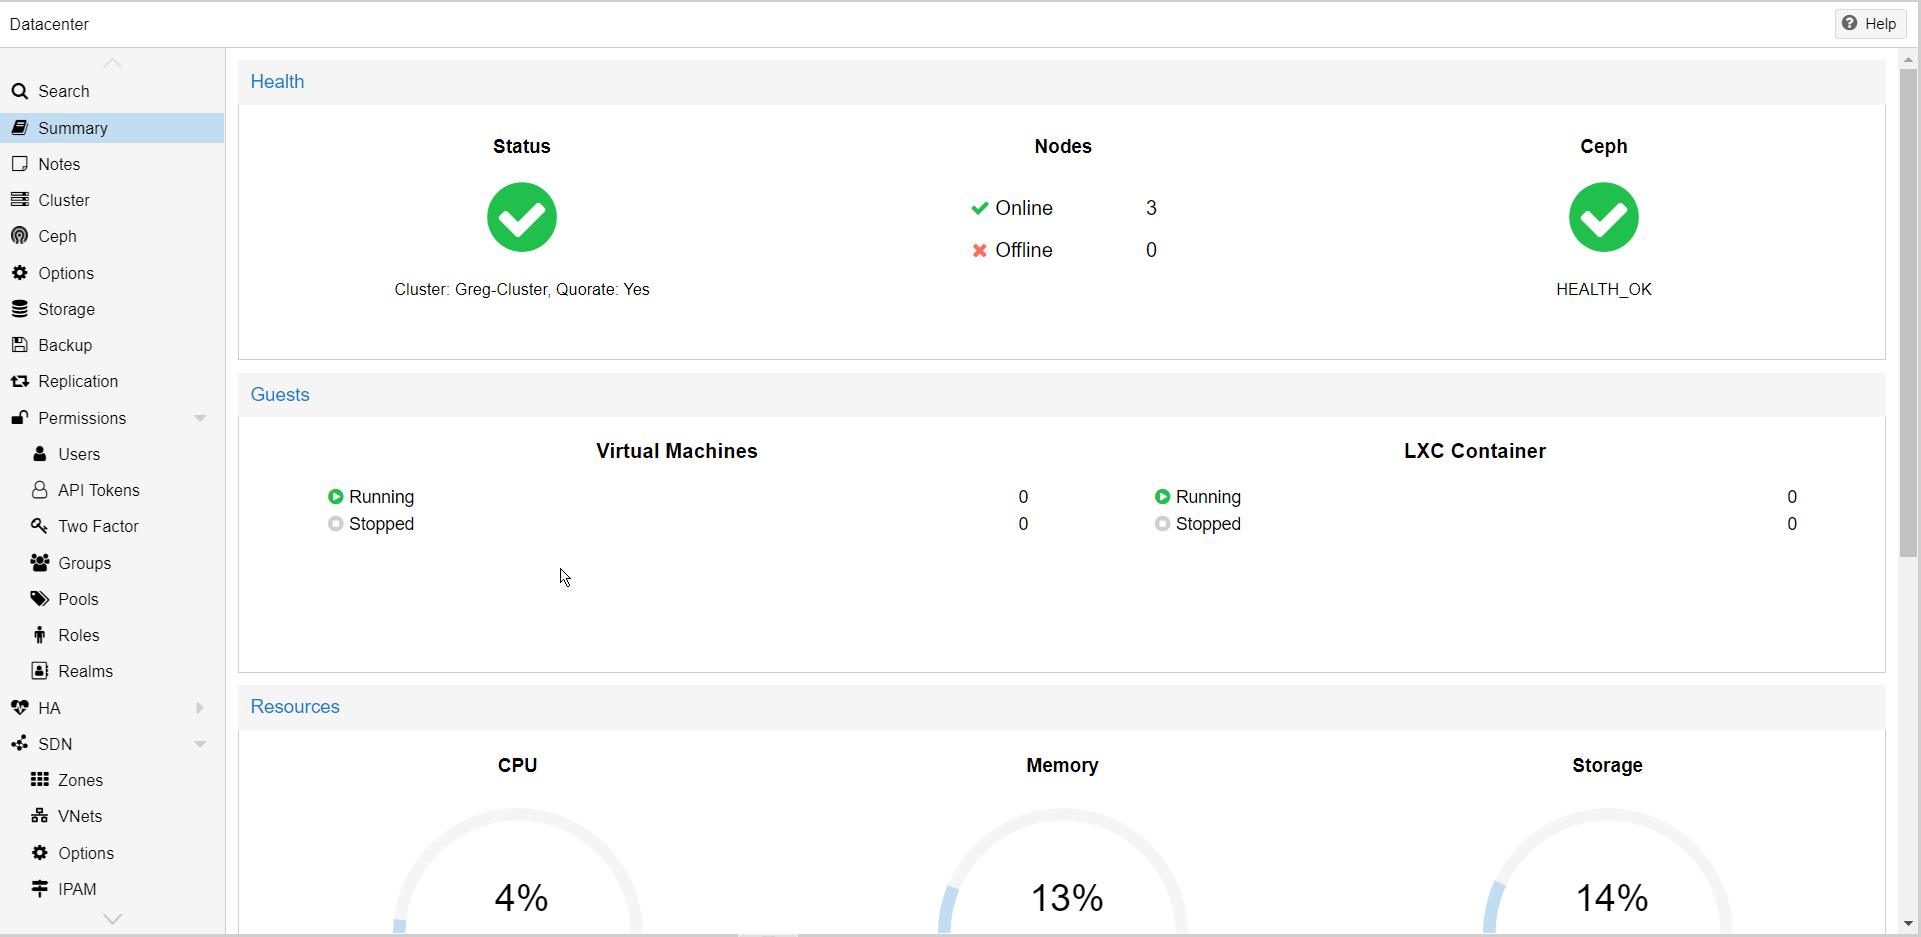
Everything is now set up, and the cluster is fully high-available on both the compute and storage sides.
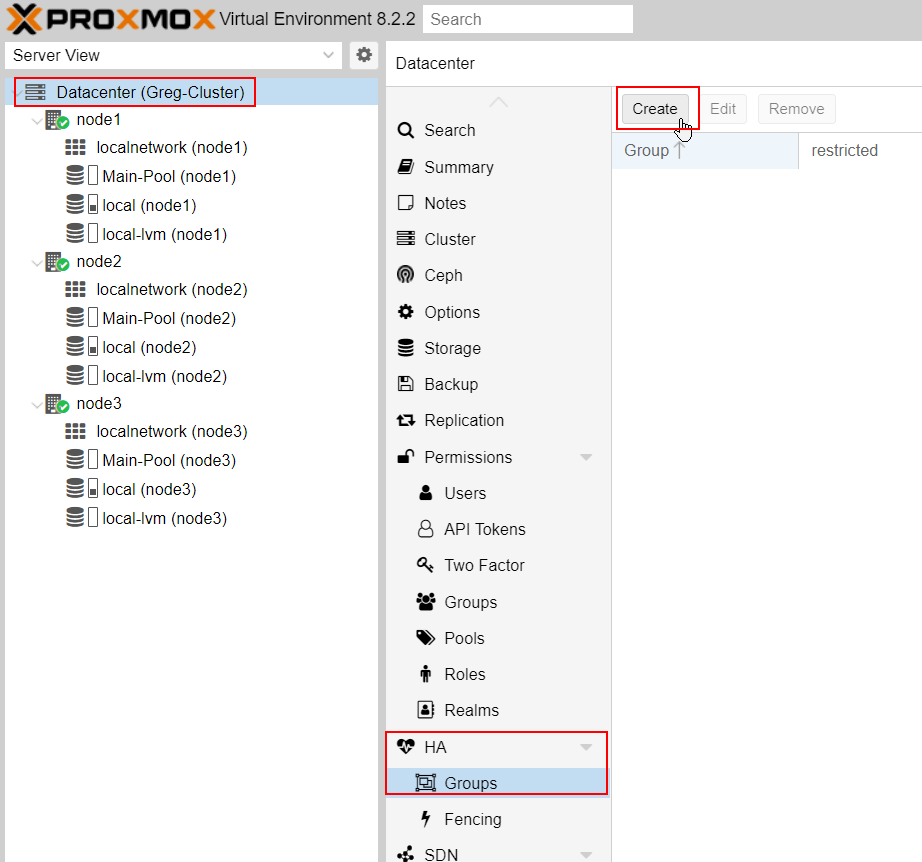
9/ High Availability configuration
On Datacenter, go to HA -> group and create a new group :
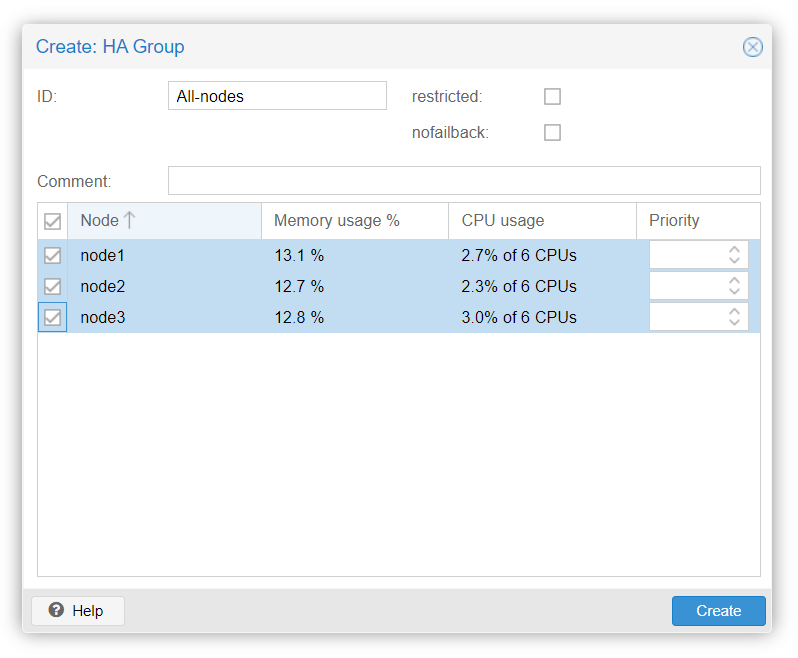
Name the group and select the nodes you want to be part of this HA group :
Now, add the needed VM or Containers to this HA group.
As an example, I will add my Debian12 Container to this group for a full HA :
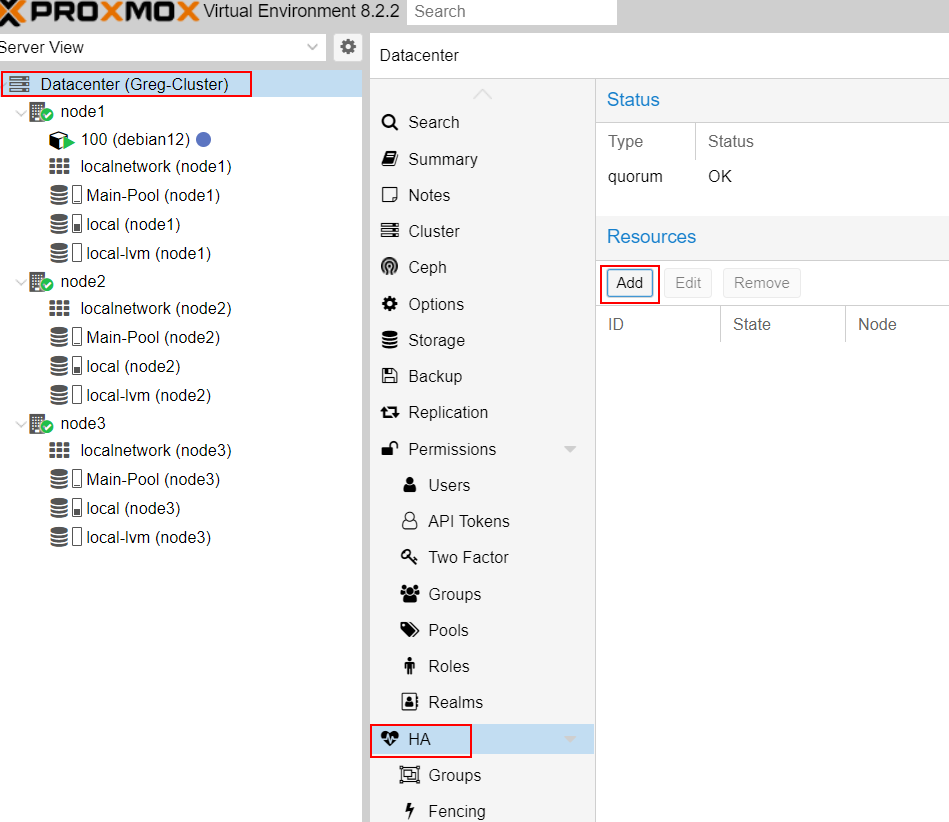
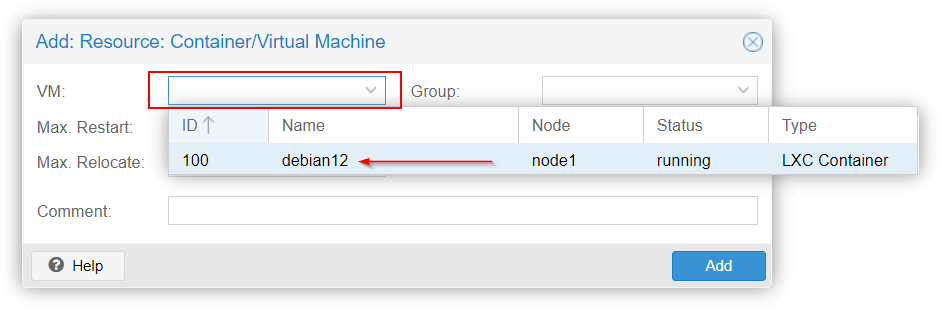
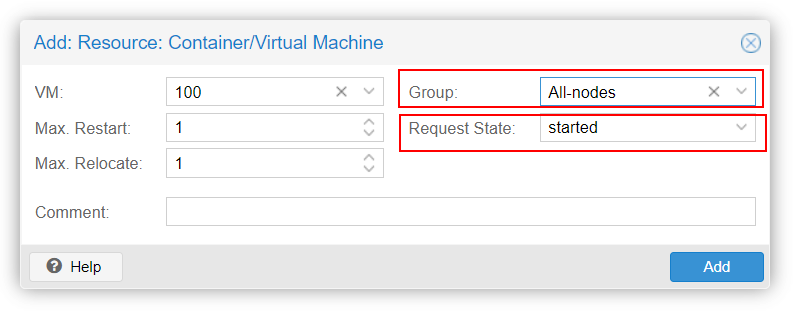
Et voilà, your VM/CT is now added to the High Availabilty group !
Give it a whirl by powering down the host where your VM/CT is hanging out. Then, sit back and enjoy the show as it migrates and springs back to life on one of the other online nodes ! Magic ! ✨

10/ Fine-tuning the details
Subscription warning
Since this is the free version of Proxmox, the cluster will give you a little nudge every time you log in, reminding you that you don’t have a subscription.
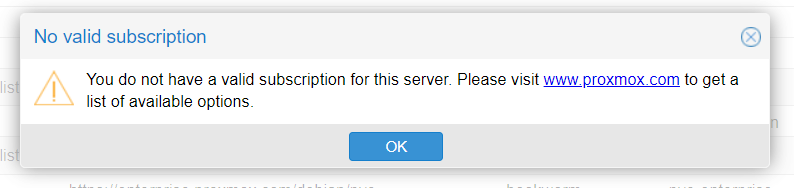
As a result, the free repository isn't added for system updates.
To fix this, you can run the following script:
bash -c "$(wget -qLO - https://github.com/tteck/Proxmox/raw/main/misc/post-pve-install.sh)"
Run it on each of your node thru the console.
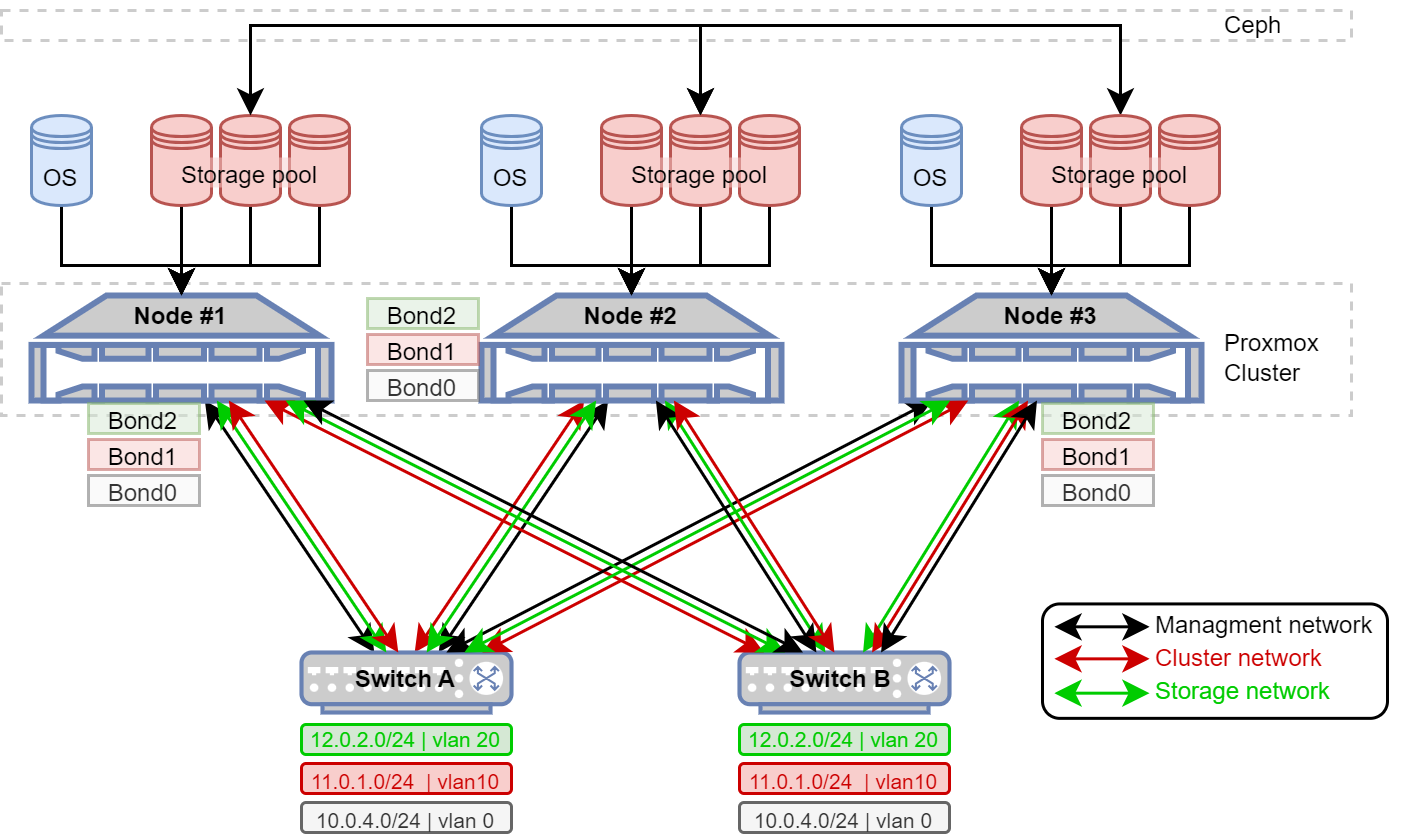
That’s it, folks ! Enjoy your new lab with no spof*, rock-solid and ready to roll !
To be fair, the network paths and switches are still points of failure.
You can address this by doubling up on interfaces and switches, setting up network bonding on Proxmox, and enabling LACP (802.3ad) on your switches.
Network isolation can be achieved using VLAN tagging.
If the switches don’t support LACP or are simply unmanaged switches, then Balance-alb (Adaptive Load Balancing) is a solid alternative.
We might cover this in a future article.
Here’s a diagram of the fully redundant infrastructure :