
Efficiently backup customer devices even with low Internet bandwidth


I have a rocking a beautiful 10GB FTTH fiber connection—lucky me!
But not everyone’s so fortunate. Some folks are stuck with old-school ADSL and a snail-paced 1MB upload speed.
Luckily, technology saves the day ! With deduplication, compression, and always incremental backup strategies, we only need to send a few daily blocks. These get squeezed and optimized to fit even the most pitiful upload speeds.
problem solve ? Mmmmm... not really.
Here’s the catch: the first backup still needs to send all the data—the dreaded “painful full.” Even with deduplication and compression doing their best, it results in painfully long backup times and unacceptable for this customers that lead to business loss for the MSP.
💡 And from this premise, an idea was born :
The customer can back up the full dataset to a USB drive and physically send it to the MSP. With a blazing 10GB WAN, the MSP uploads the data to the customer’s cloud tenant. From there, the customer can continue with incremental backups to the cloud, since the full backup is already taken care of.
To handle uploads and downloads to/from the cloud, Acronis offers a command-line tool called 'Archive_IO_CTL'. Definitely not user-friendly and tends to make the process more complicated than it needs to be.
Let's build a graphical tool, easy to manage, to help low bandwidth MSP's customers to backup !
The plan :
- Use native Acronis process to manage the switch between USB drive and Cloud storage
- Build GUI to simply the process
- Ask for client certificate
- Ask for backup archive to upload (TIBX file)
- Ask for destination Cloud storage to upload to (FQDN)
- control 'Archive_IO_CTL' to do the job
Process flow diagram :
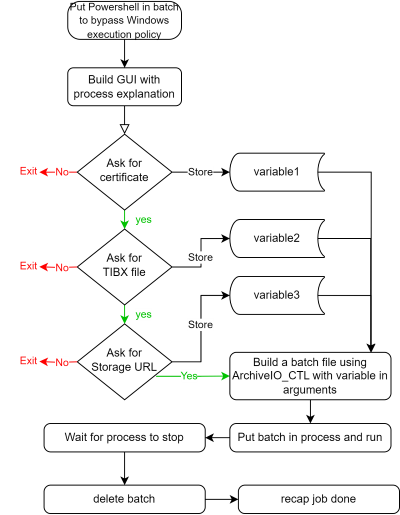
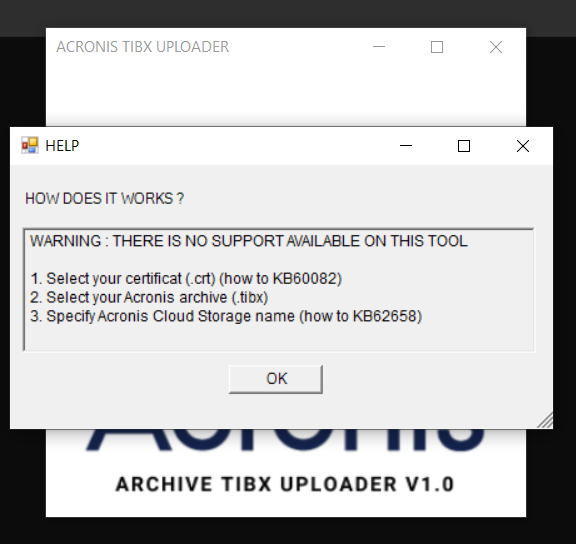
Fire-up PowerShell and let's start by saying hello and introduce ourselves with a splash screen
# Splashscreen
$dialog = New-Object System.Windows.Forms.Form
$dialog.Text = "ACRONIS TIBX UPLOADER"
$dialog.Width = 400
$dialog.Height = 400
$dialog.BackColor = [System.Drawing.Color]::White
$dialog.FormBorderStyle = [System.Windows.Forms.FormBorderStyle]::FixedDialog
$dialog.StartPosition = [System.Windows.Forms.FormStartPosition]::CenterScreen

# Show picture
$pictureBox = New-Object System.Windows.Forms.PictureBox
$pictureBox.ImageLocation = "Acronis-logo.png"
$pictureBox.SizeMode = [System.Windows.Forms.PictureBoxSizeMode]::Zoom
$pictureBox.Dock = [System.Windows.Forms.DockStyle]::Fill

$dialog.Controls.Add($pictureBox)
Then the GUI should explain the process
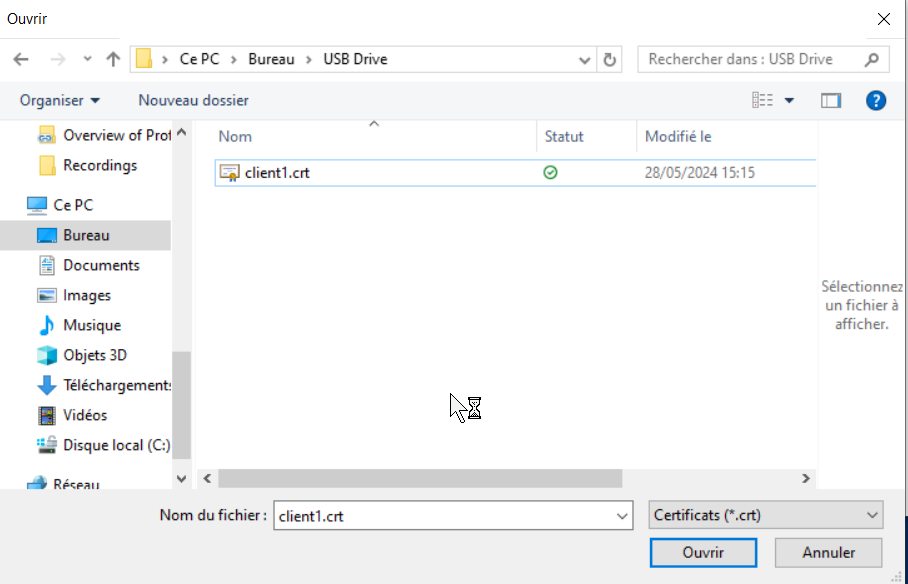
- Select the certificate : this is mandatory to know in wich tenant data should be send to. How to get the certificate is explained in this KB60082
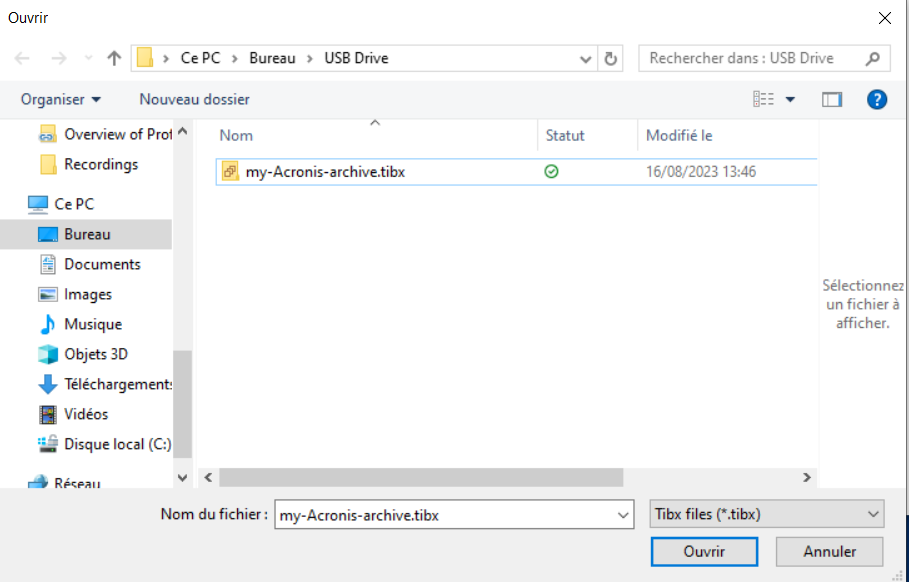
- Select the TIBX archive : this is the full backup that have been sent using USB drive.
- Input the Cloud storage URL : to know to which Acronis DC the tenant belong. How to know the Cloud storage URL is explained in this KB62658
managed by the following code :
$commentDialog = New-Object System.Windows.Forms.Form
$commentDialog.Text = "HELP"
$commentDialog.Width = 450
$commentDialog.Height = 200
$commentDialog.StartPosition = [System.Windows.Forms.FormStartPosition]::CenterScreen

$commentLabel = New-Object System.Windows.Forms.Label
$commentLabel.Text = "HOW DOES IT WORKS ?"
$commentLabel.Location = New-Object System.Drawing.Point(10, 20)
$commentLabel.AutoSize = $true

$commentTextBox = New-Object System.Windows.Forms.TextBox
$commentTextBox.Multiline = $true
$commentTextBox.Text = @"
1. Select your client certificat (.crt) (KB60082)
2. Select your acronis archive (.tibx)
3. Share your cloud storage URL (KB62658)
"@
$commentTextBox.Location = New-Object System.Drawing.Point(10, 50)
$commentTextBox.Width = 410
$commentTextBox.Height = 70
$commentTextBox.ReadOnly = $true
$commentTextBox.Font = New-Object System.Drawing.Font("Arial", 9)

$okButton = New-Object System.Windows.Forms.Button
$okButton.Text = "OK"
$okButton.DialogResult = [System.Windows.Forms.DialogResult]::OK
$okButton.Location = New-Object System.Drawing.Point(175, 120)

$commentDialog.Controls.Add($commentLabel)
$commentDialog.Controls.Add($commentTextBox)
$commentDialog.Controls.Add($okButton)

# show the "HOW TO"
$commentResult = $commentDialog.ShowDialog()

# check if user clicked on OK on "HOW TO" windows
if ($commentResult -eq [System.Windows.Forms.DialogResult]::OK) {
Then, each dialog box will prompt for the specific type of data needed :
- Certificate
- Archive TIBX
- Cloud storage URL
$fileDialog = New-Object System.Windows.Forms.OpenFileDialog
# show only .crt et .tibx
$fileDialog.Filter = "Certificats (*.crt)|*.crt|Archive Tibx (*.tibx)|*.tibx"

# show dialog box
$dialogResult = $fileDialog.ShowDialog()

# check if user select a file
if ($dialogResult -eq 'OK') {
    # store the file path
    $cheminCertificat = $fileDialog.FileName

    # ask to the user to select a .tibx
    $tibxFileDialog = New-Object System.Windows.Forms.OpenFileDialog
    $tibxFileDialog.Filter = "Fichiers Tibx (*.tibx)|*.tibx"
    $tibxResult = $tibxFileDialog.ShowDialog()

    # check if user select a .tibx
    if ($tibxResult -eq 'OK') {
        # store the full path
        $cheminTibx = $tibxFileDialog.FileName

		# get the TIBX name from the full path
        $nomTibx = [System.IO.Path]::GetFileNameWithoutExtension($cheminTibx)

        # create a new dialog for the URL storage
        $urlDialog = New-Object System.Windows.Forms.Form
        $urlDialog.Text = "what is your storage name ?"
        $urlDialog.Width = 800
        $urlDialog.Height = 150
		$urlDialog.StartPosition = "CenterScreen"

        $urlLabel = New-Object System.Windows.Forms.Label
        $urlLabel.Text = "Cloud storage name :"
        $urlLabel.Location = New-Object System.Drawing.Point(10, 30)
        $urlLabel.AutoSize = $true

        $urlTextBox = New-Object System.Windows.Forms.TextBox
        $urlTextBox.Location = New-Object System.Drawing.Point(170, 30)
        $urlTextBox.Width = 600

        $okButton = New-Object System.Windows.Forms.Button
        $okButton.Text = "OK"
        $okButton.DialogResult = [System.Windows.Forms.DialogResult]::OK
        $okButton.Location = New-Object System.Drawing.Point(650, 70)

        $urlDialog.Controls.Add($urlLabel)
        $urlDialog.Controls.Add($urlTextBox)
        $urlDialog.Controls.Add($okButton)

        # hsow the dialog box
        $dialogResult = $urlDialog.ShowDialog()

        # check if user click on OK
        if ($dialogResult -eq [System.Windows.Forms.DialogResult]::OK) {
            # Récupère l'URL saisie par l'utilisateur
            $url = $urlTextBox.Text
Now that all variables are filled, we can craft a batch script to use 'archive_IO_CTL'
$commandeBatch = "@echo off`r`nset Certificat=$cheminCertificat`r`nset cheminTibx=$cheminTibx`r`nset nomTibx=$nomTibx`r`nset url=$url`r`narchive_io_ctl.exe --copy=""%cheminTibx%"" --astor %url% --cert %Certificat% --dst=""/1/%nomTibx%.tibx"" --show-progress --infinite-timeouts`r`n"

$commandeBatch | Out-File -Encoding ASCII -FilePath "script.bat"
We can now run the batch script and wait for the upload to finish
$batchProcess = Start-Process -FilePath "script.bat" -PassThru
# wait for the process to finish
$batchProcess.WaitForExit()
# delete the batch script
Remove-Item "script.bat"
All done : Let's run our first upload !
We'll request to use Acronis' default physical data shipping process to back up data temporarily to a USB drive.
Create a backup plan for the entire machine, to the Cloud and click to 'backup options'
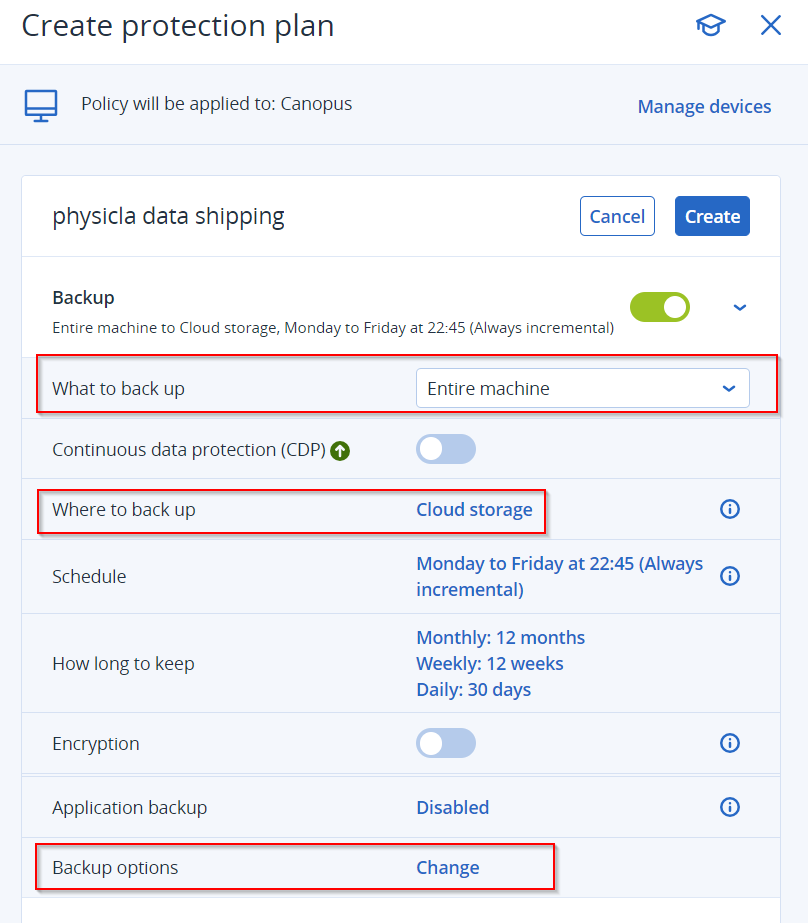
Once in 'backup option', enable 'Physical data shipping'
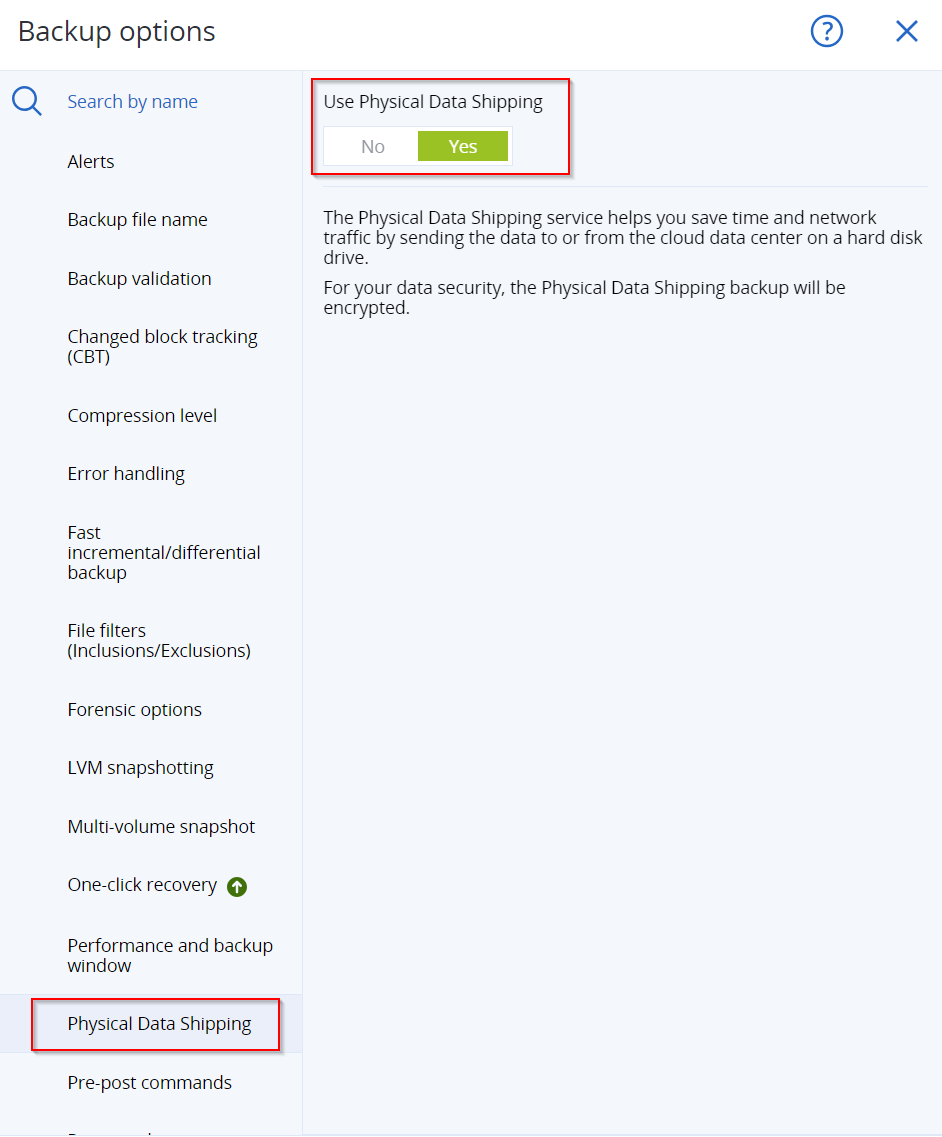
back to your backup, select your USB drive in 'Physical data shipping'
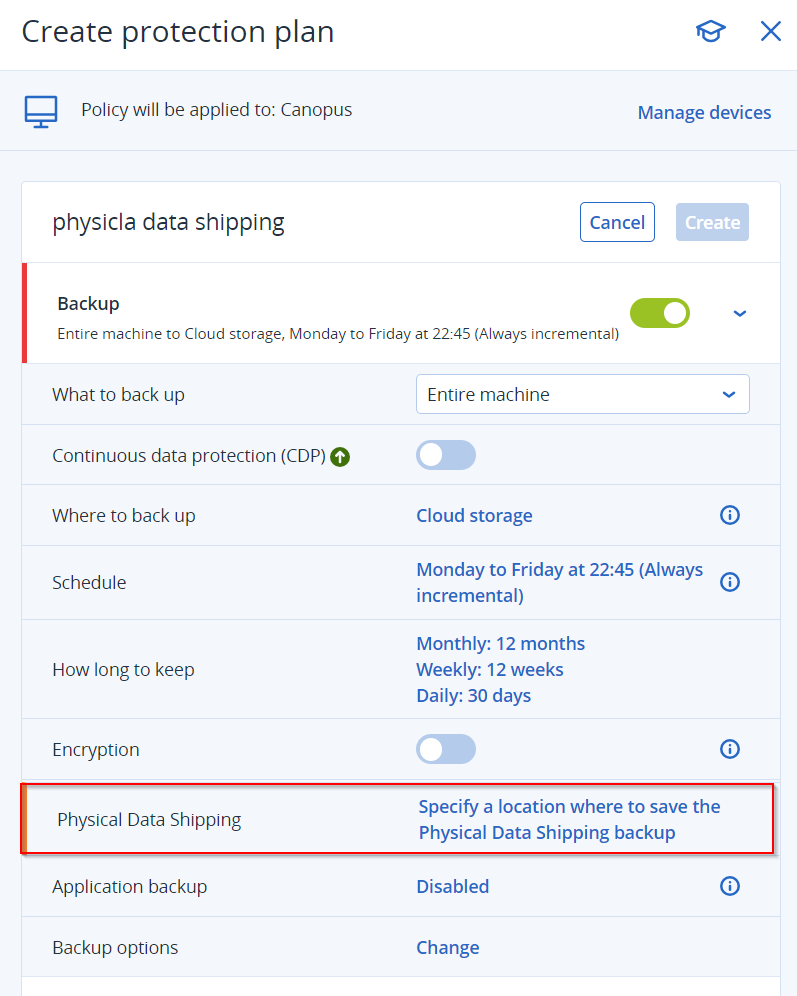
Save your plan and execute it or wait for the scheduler to execute it.
Once the plan has been executed (important, as the certificate is created when the plan starts), go to the backed-up device and copy the certificate to the USB drive (follow KB60082 for details).
Then, send the USB drive to a location with a fast upload WAN. 🚀
At the location, run the script and follow the process to upload to the Cloud.
Select your certificate
Select your TIBX archive file
Add your Acronis Cloud storage URL (to know it, follow KB62658)

Watch the upload process starting
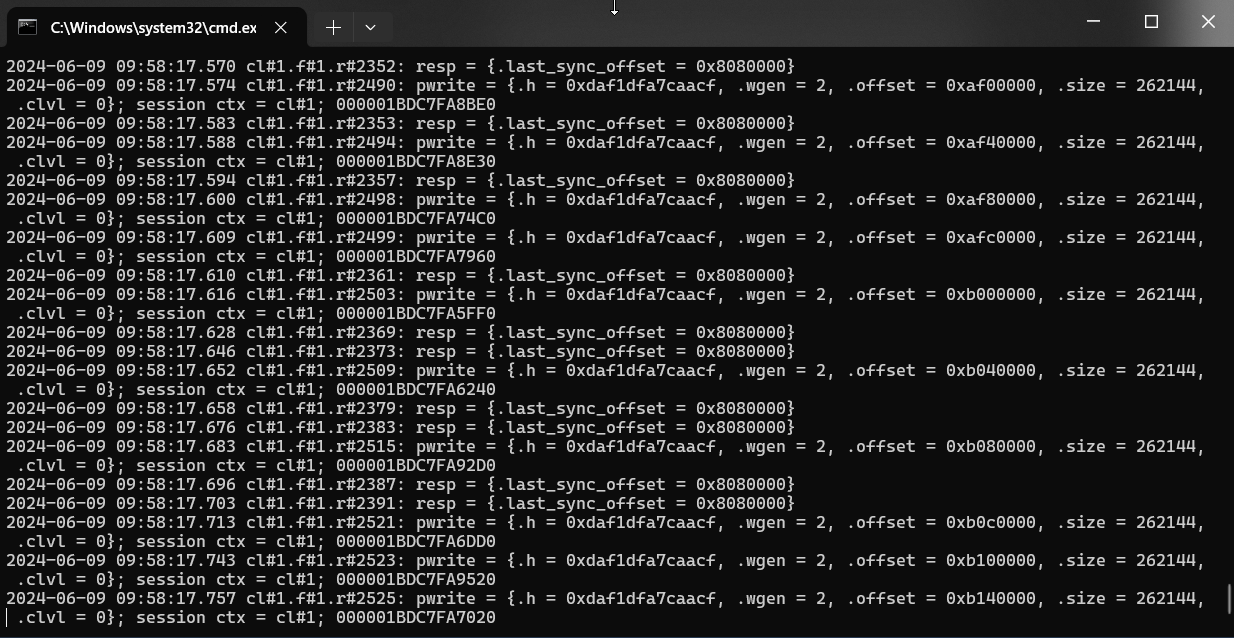
Relax, take your time— the data is on its way to the Cloud. 🌥️

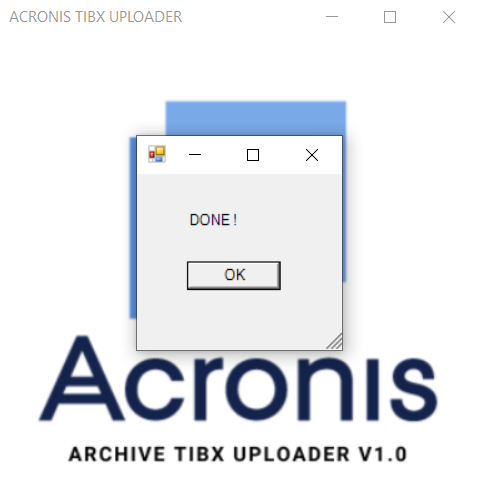
TADAM ! Et voila ! Data are in the Cloud and now the job can run in 'always incremental' mode. 🥳
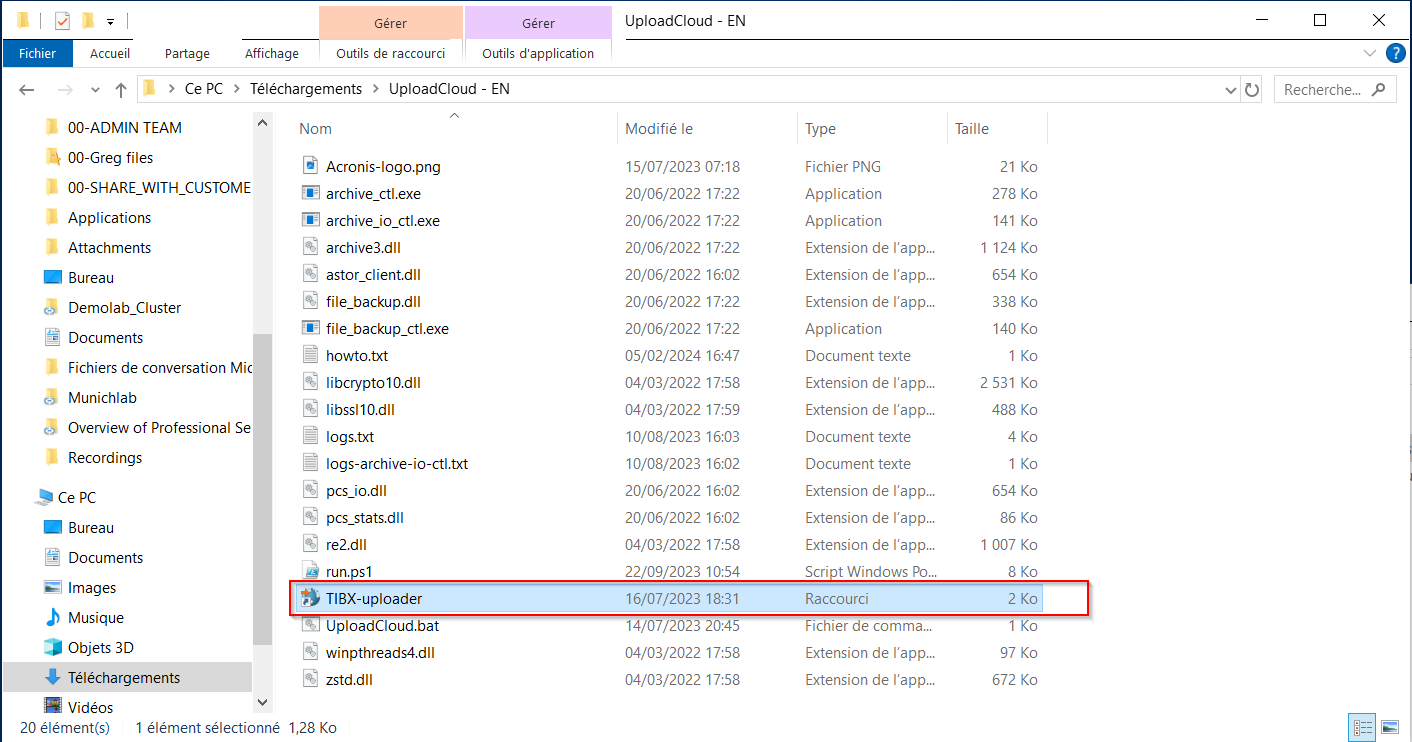
Download the whole script below with all the needed component :
Or copy the whole PowerShell script from here:
Add-Type -AssemblyName System.Windows.Forms

# Splashscreen
$dialog = New-Object System.Windows.Forms.Form
$dialog.Text = "ACRONIS TIBX UPLOADER"
$dialog.Width = 400
$dialog.Height = 400
$dialog.BackColor = [System.Drawing.Color]::White
$dialog.FormBorderStyle = [System.Windows.Forms.FormBorderStyle]::FixedDialog
$dialog.StartPosition = [System.Windows.Forms.FormStartPosition]::CenterScreen

# affiche l'image
$pictureBox = New-Object System.Windows.Forms.PictureBox
$pictureBox.ImageLocation = "Acronis-logo.png"
$pictureBox.SizeMode = [System.Windows.Forms.PictureBoxSizeMode]::Zoom
$pictureBox.Dock = [System.Windows.Forms.DockStyle]::Fill

$dialog.Controls.Add($pictureBox)

# Affiche la boîte de dialogue sans attendre la fermeture
$dialog.Show()

# Affiche la boîte de dialogue "Comment procéder"
$commentDialog = New-Object System.Windows.Forms.Form
$commentDialog.Text = "HELP"
$commentDialog.Width = 450
$commentDialog.Height = 250
$commentDialog.StartPosition = [System.Windows.Forms.FormStartPosition]::CenterScreen

$commentLabel = New-Object System.Windows.Forms.Label
$commentLabel.Text = "HOW DOES IT WORKS ?"
$commentLabel.Location = New-Object System.Drawing.Point(10, 20)
$commentLabel.AutoSize = $true

$commentTextBox = New-Object System.Windows.Forms.TextBox
$commentTextBox.Multiline = $true
$commentTextBox.Text = @"
WARNING : THERE IS NO SUPPORT AVAILABLE ON THIS TOOL

1. Select your certificat (.crt) (how to KB60082)
2. Select your Acronis archive (.tibx)
3. Specify Acronis Cloud Storage name (how to KB62658)
"@
$commentTextBox.Location = New-Object System.Drawing.Point(10, 50)
$commentTextBox.Width = 410
$commentTextBox.Height = 100
$commentTextBox.ReadOnly = $true
$commentTextBox.Font = New-Object System.Drawing.Font("Arial", 9)

$okButton = New-Object System.Windows.Forms.Button
$okButton.Text = "OK"
$okButton.DialogResult = [System.Windows.Forms.DialogResult]::OK
$okButton.Location = New-Object System.Drawing.Point(175, 160)

$commentDialog.Controls.Add($commentLabel)
$commentDialog.Controls.Add($commentTextBox)
$commentDialog.Controls.Add($okButton)

# Affiche la boîte de dialogue "HOW TO"
$commentResult = $commentDialog.ShowDialog()

# Vérifie si l'utilisateur a cliqué sur OK dans la boîte de dialogue "HOW TO"
if ($commentResult -eq [System.Windows.Forms.DialogResult]::OK) {

# Crée une instance de la boîte de dialogue de sélection de fichiers
$fileDialog = New-Object System.Windows.Forms.OpenFileDialog

# Affiche uniquement les fichiers .crt et .tibx dans la boîte de dialogue
$fileDialog.Filter = "Certificats (*.crt)|*.crt|Archive Tibx (*.tibx)|*.tibx"

# Affiche la boîte de dialogue de sélection de fichiers et attend la sélection de l'utilisateur
$dialogResult = $fileDialog.ShowDialog()

# Vérifie si l'utilisateur a sélectionné un fichier
if ($dialogResult -eq 'OK') {
    # Récupère le chemin complet du fichier sélectionné
    $cheminCertificat = $fileDialog.FileName

    # Demande à l'utilisateur de sélectionner un fichier .tibx
    $tibxFileDialog = New-Object System.Windows.Forms.OpenFileDialog
    $tibxFileDialog.Filter = "Tibx files (*.tibx)|*.tibx"
    $tibxResult = $tibxFileDialog.ShowDialog()

    # Vérifie si l'utilisateur a sélectionné un fichier .tibx
    if ($tibxResult -eq 'OK') {
        # Récupère le chemin complet du fichier .tibx sélectionné
        $cheminTibx = $tibxFileDialog.FileName

		# Récupère le nom du fichier .tibx à partir du chemin complet
        $nomTibx = [System.IO.Path]::GetFileNameWithoutExtension($cheminTibx)

        # Crée une boîte de dialogue personnalisée avec un champ texte pour l'URL
        $urlDialog = New-Object System.Windows.Forms.Form
        $urlDialog.Text = "Enter Cloud storage name : "
        $urlDialog.Width = 800
        $urlDialog.Height = 150
		$urlDialog.StartPosition = "CenterScreen"

        $urlLabel = New-Object System.Windows.Forms.Label
        $urlLabel.Text = "Cloud storage name : "
        $urlLabel.Location = New-Object System.Drawing.Point(10, 30)
        $urlLabel.AutoSize = $true

        $urlTextBox = New-Object System.Windows.Forms.TextBox
        $urlTextBox.Location = New-Object System.Drawing.Point(170, 30)
        $urlTextBox.Width = 600

        $okButton = New-Object System.Windows.Forms.Button
        $okButton.Text = "OK"
        $okButton.DialogResult = [System.Windows.Forms.DialogResult]::OK
        $okButton.Location = New-Object System.Drawing.Point(650, 70)

        $urlDialog.Controls.Add($urlLabel)
        $urlDialog.Controls.Add($urlTextBox)
        $urlDialog.Controls.Add($okButton)

        # Affiche la boîte de dialogue de saisie de l'URL
        $dialogResult = $urlDialog.ShowDialog()

        # Vérifie si l'utilisateur a cliqué sur OK
        if ($dialogResult -eq [System.Windows.Forms.DialogResult]::OK) {
            # Récupère l'URL saisie par l'utilisateur
            $url = $urlTextBox.Text

        # Affiche les valeurs sélectionnées par l'utilisateur
        Write-Host " "
		Write-Host "-------------------------------------"
		Write-Host "The certificate path is : $cheminCertificat"
        Write-Host "The tibx path is : $cheminTibx"
		Write-Host "The name of the tibx file is : $nomTibx.tibx"
        Write-Host "The Cloud Storage name is : $url"
		Write-Host "-------------------------------------"
		Write-Host " "
		Write-Host "--------------------------------------------------------------------"
		Write-Host "---> Uploading to the Cloud... (wait for the other window to close)"
		Write-Host "--------------------------------------------------------------------"
		Write-Host " "

		# Exécute la commande batch avec les variables sélectionnées
        $commandeBatch = "@echo off`r`nset Certificat=$cheminCertificat`r`nset cheminTibx=$cheminTibx`r`nset nomTibx=$nomTibx`r`nset url=$url`r`narchive_io_ctl.exe --copy=""%cheminTibx%"" --astor-protos 2 --clients 6 --astor %url% --cert ""%Certificat%"" --dst=""/1/%nomTibx%.tibx"" --show-progress --infinite-timeouts`r`n"

        $commandeBatch | Out-File -Encoding ASCII -FilePath "script.bat"
		# Met le batch en process
		$batchProcess = Start-Process -FilePath "script.bat" -PassThru

        # Attend que le batch se termine avant de continuer le script
        $batchProcess.WaitForExit()
        # Supprime le fichier batch après l'exécution
        Remove-Item "script.bat"

		# Affiche une boîte de dialogue "DONE"
        $doneDialog = New-Object System.Windows.Forms.Form
        $doneDialog.Text = "UPLOAD TO THE CLOUD"
        $doneDialog.Width = 180
        $doneDialog.Height = 180
        $doneDialog.StartPosition = [System.Windows.Forms.FormStartPosition]::CenterScreen

        $doneLabel = New-Object System.Windows.Forms.Label
        $doneLabel.Text = "DONE !"
        $doneLabel.Location = New-Object System.Drawing.Point(40, 30)
        $doneLabel.AutoSize = $true

        $doneButton = New-Object System.Windows.Forms.Button
        $doneButton.Text = "OK"
        $doneButton.DialogResult = [System.Windows.Forms.DialogResult]::OK
        $doneButton.Location = New-Object System.Drawing.Point(40, 70)

        $doneDialog.Controls.Add($doneLabel)
        $doneDialog.Controls.Add($doneButton)

        # Affiche la boîte de dialogue "DONE"
        $doneDialog.ShowDialog()

		# Indique la fin de l'upload par le batch
		Write-Host " "
		Write-Host "-------------------------------------"
		Write-Host "           UPLOAD DONE !          "
		Write-Host "-------------------------------------"
		Write-Host " "
            }
        }

    }
}
and don't forget to download archive_IO_CTL from here.